We train, we nourish ourselves, we track and refine. We chase moments of joy and genuine connection. Not just to extend our years, but to fully feel them—because each of us is living a story that only we can tell. It’s not about reaching the top, it’s about continuing the climb.
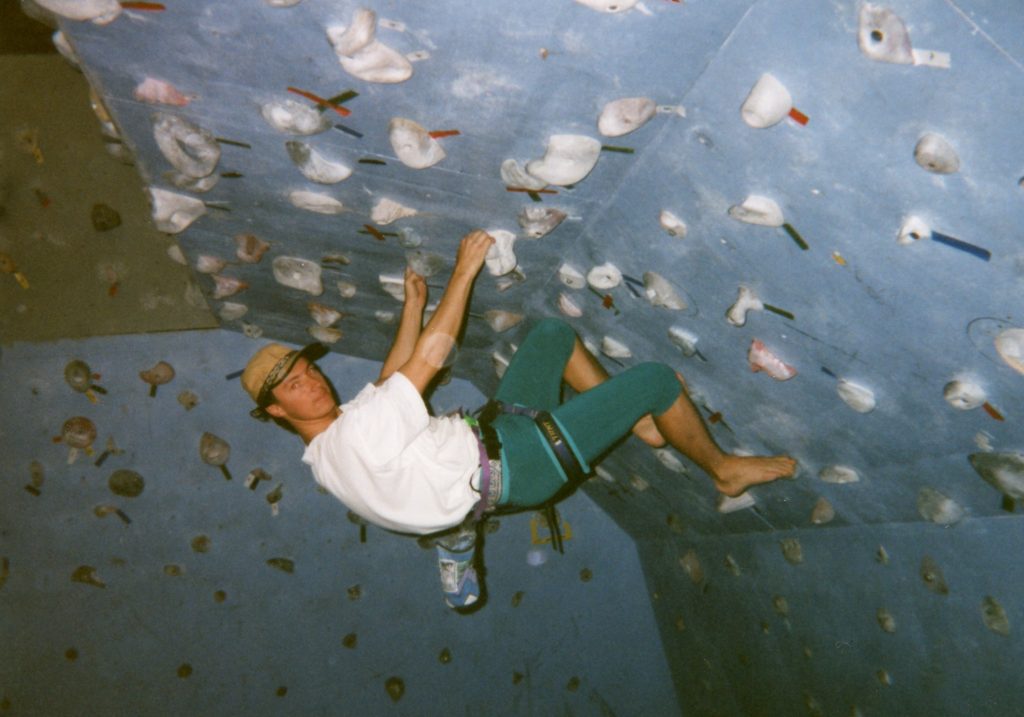
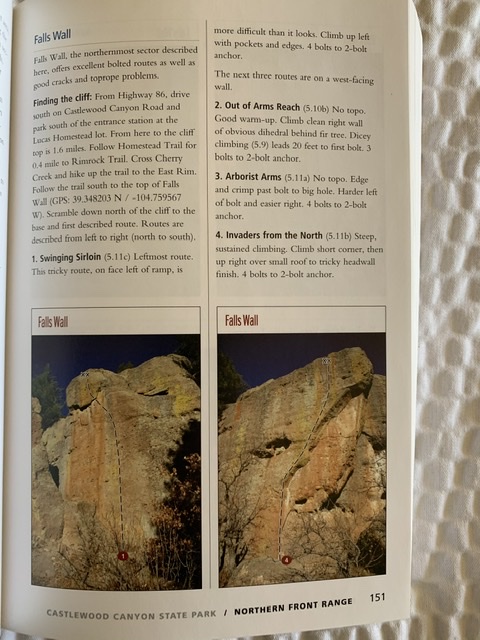
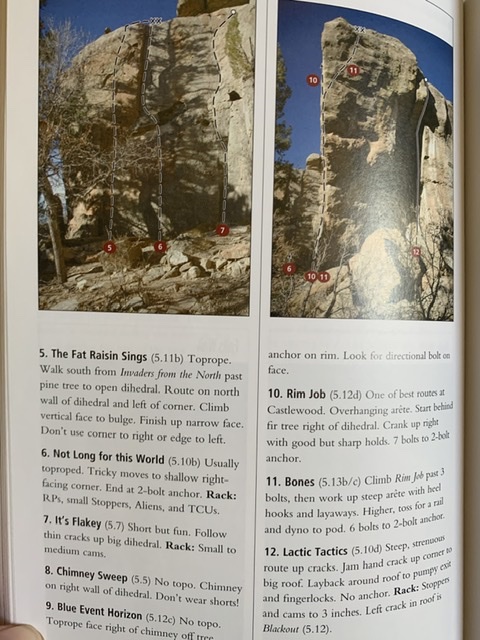
Life is an Adventure—But Why Climb?
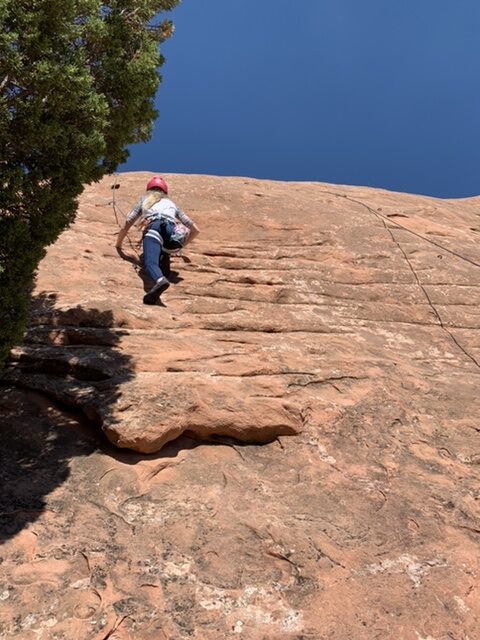
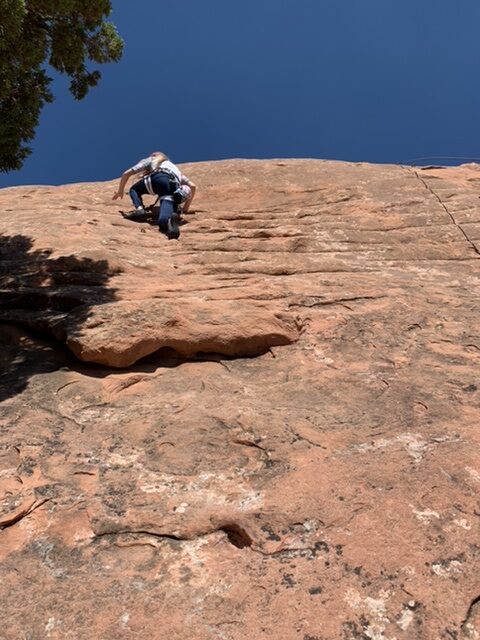
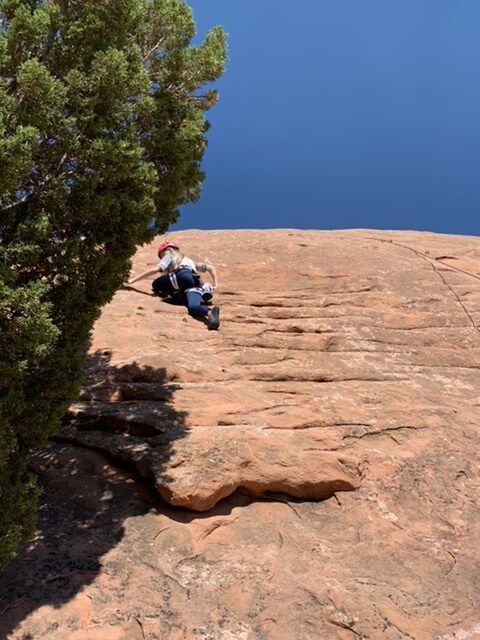
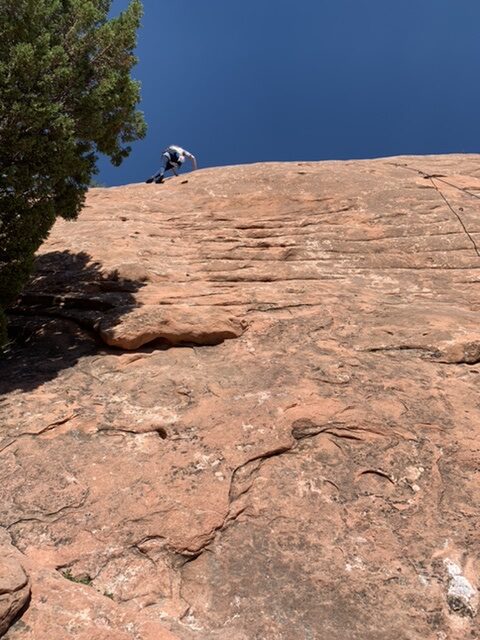
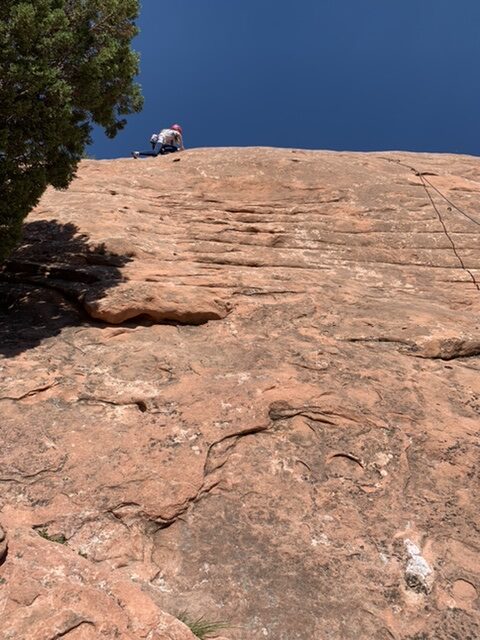
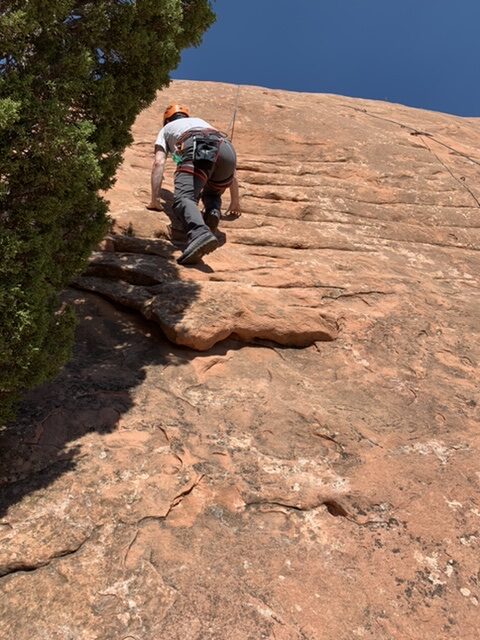
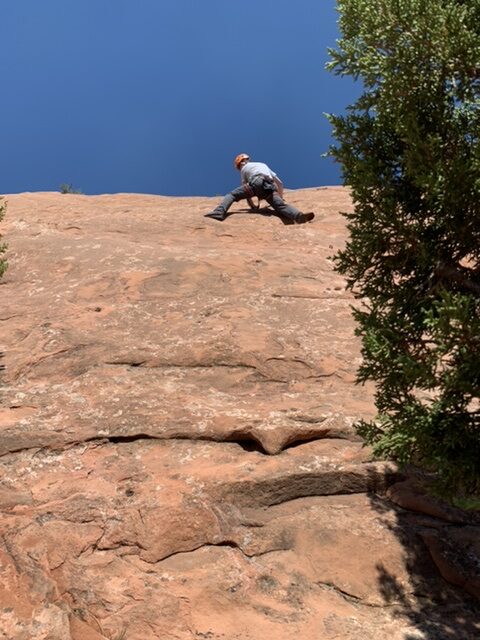
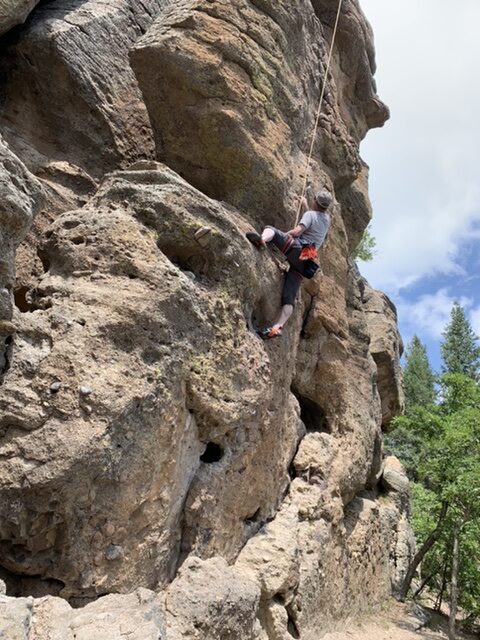
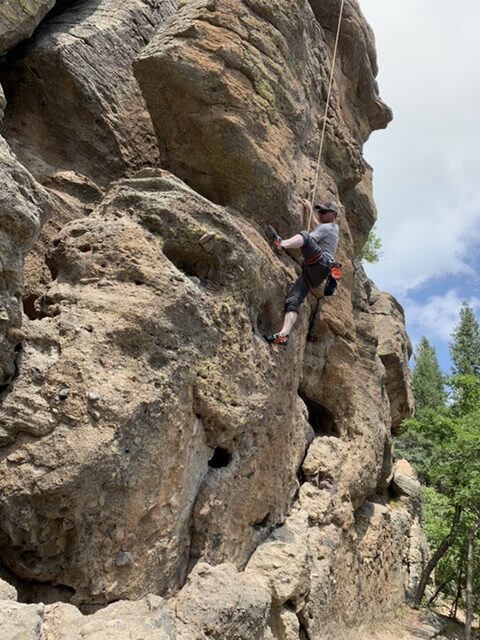
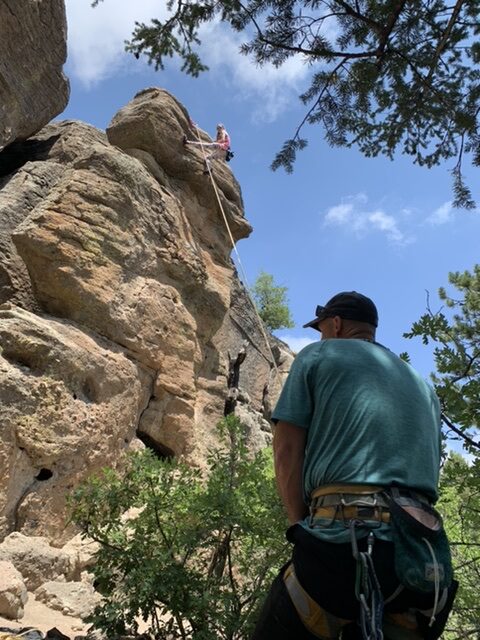
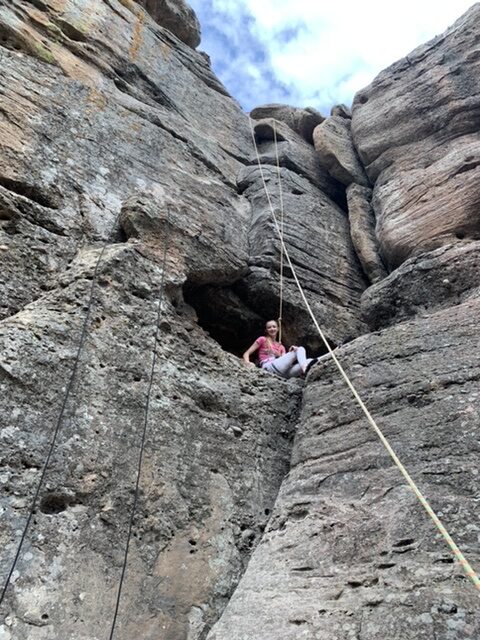
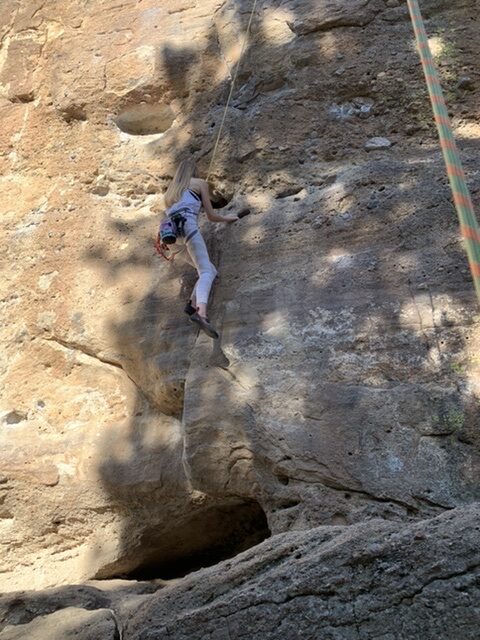
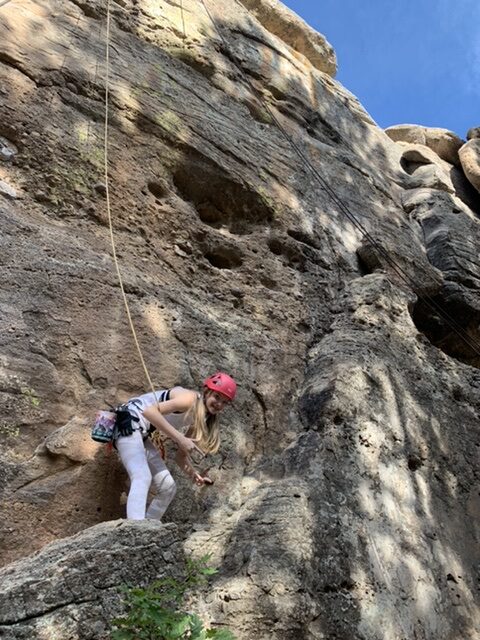
You’re in nature, you’re pushing your limits, you’re bettering your physical state, you’re getting in a workout, and you’re seeking adventure while puzzling your way trying to learn to solve curiosities through some controlled danger. What’s not to love about climbing? The setting, the exposure, a steep wall, and a degree of the unknown. Perhaps, it is the ability to keep it together and stay focused where others would freak out. Maybe it is just because the mountain is there and it’s fun.
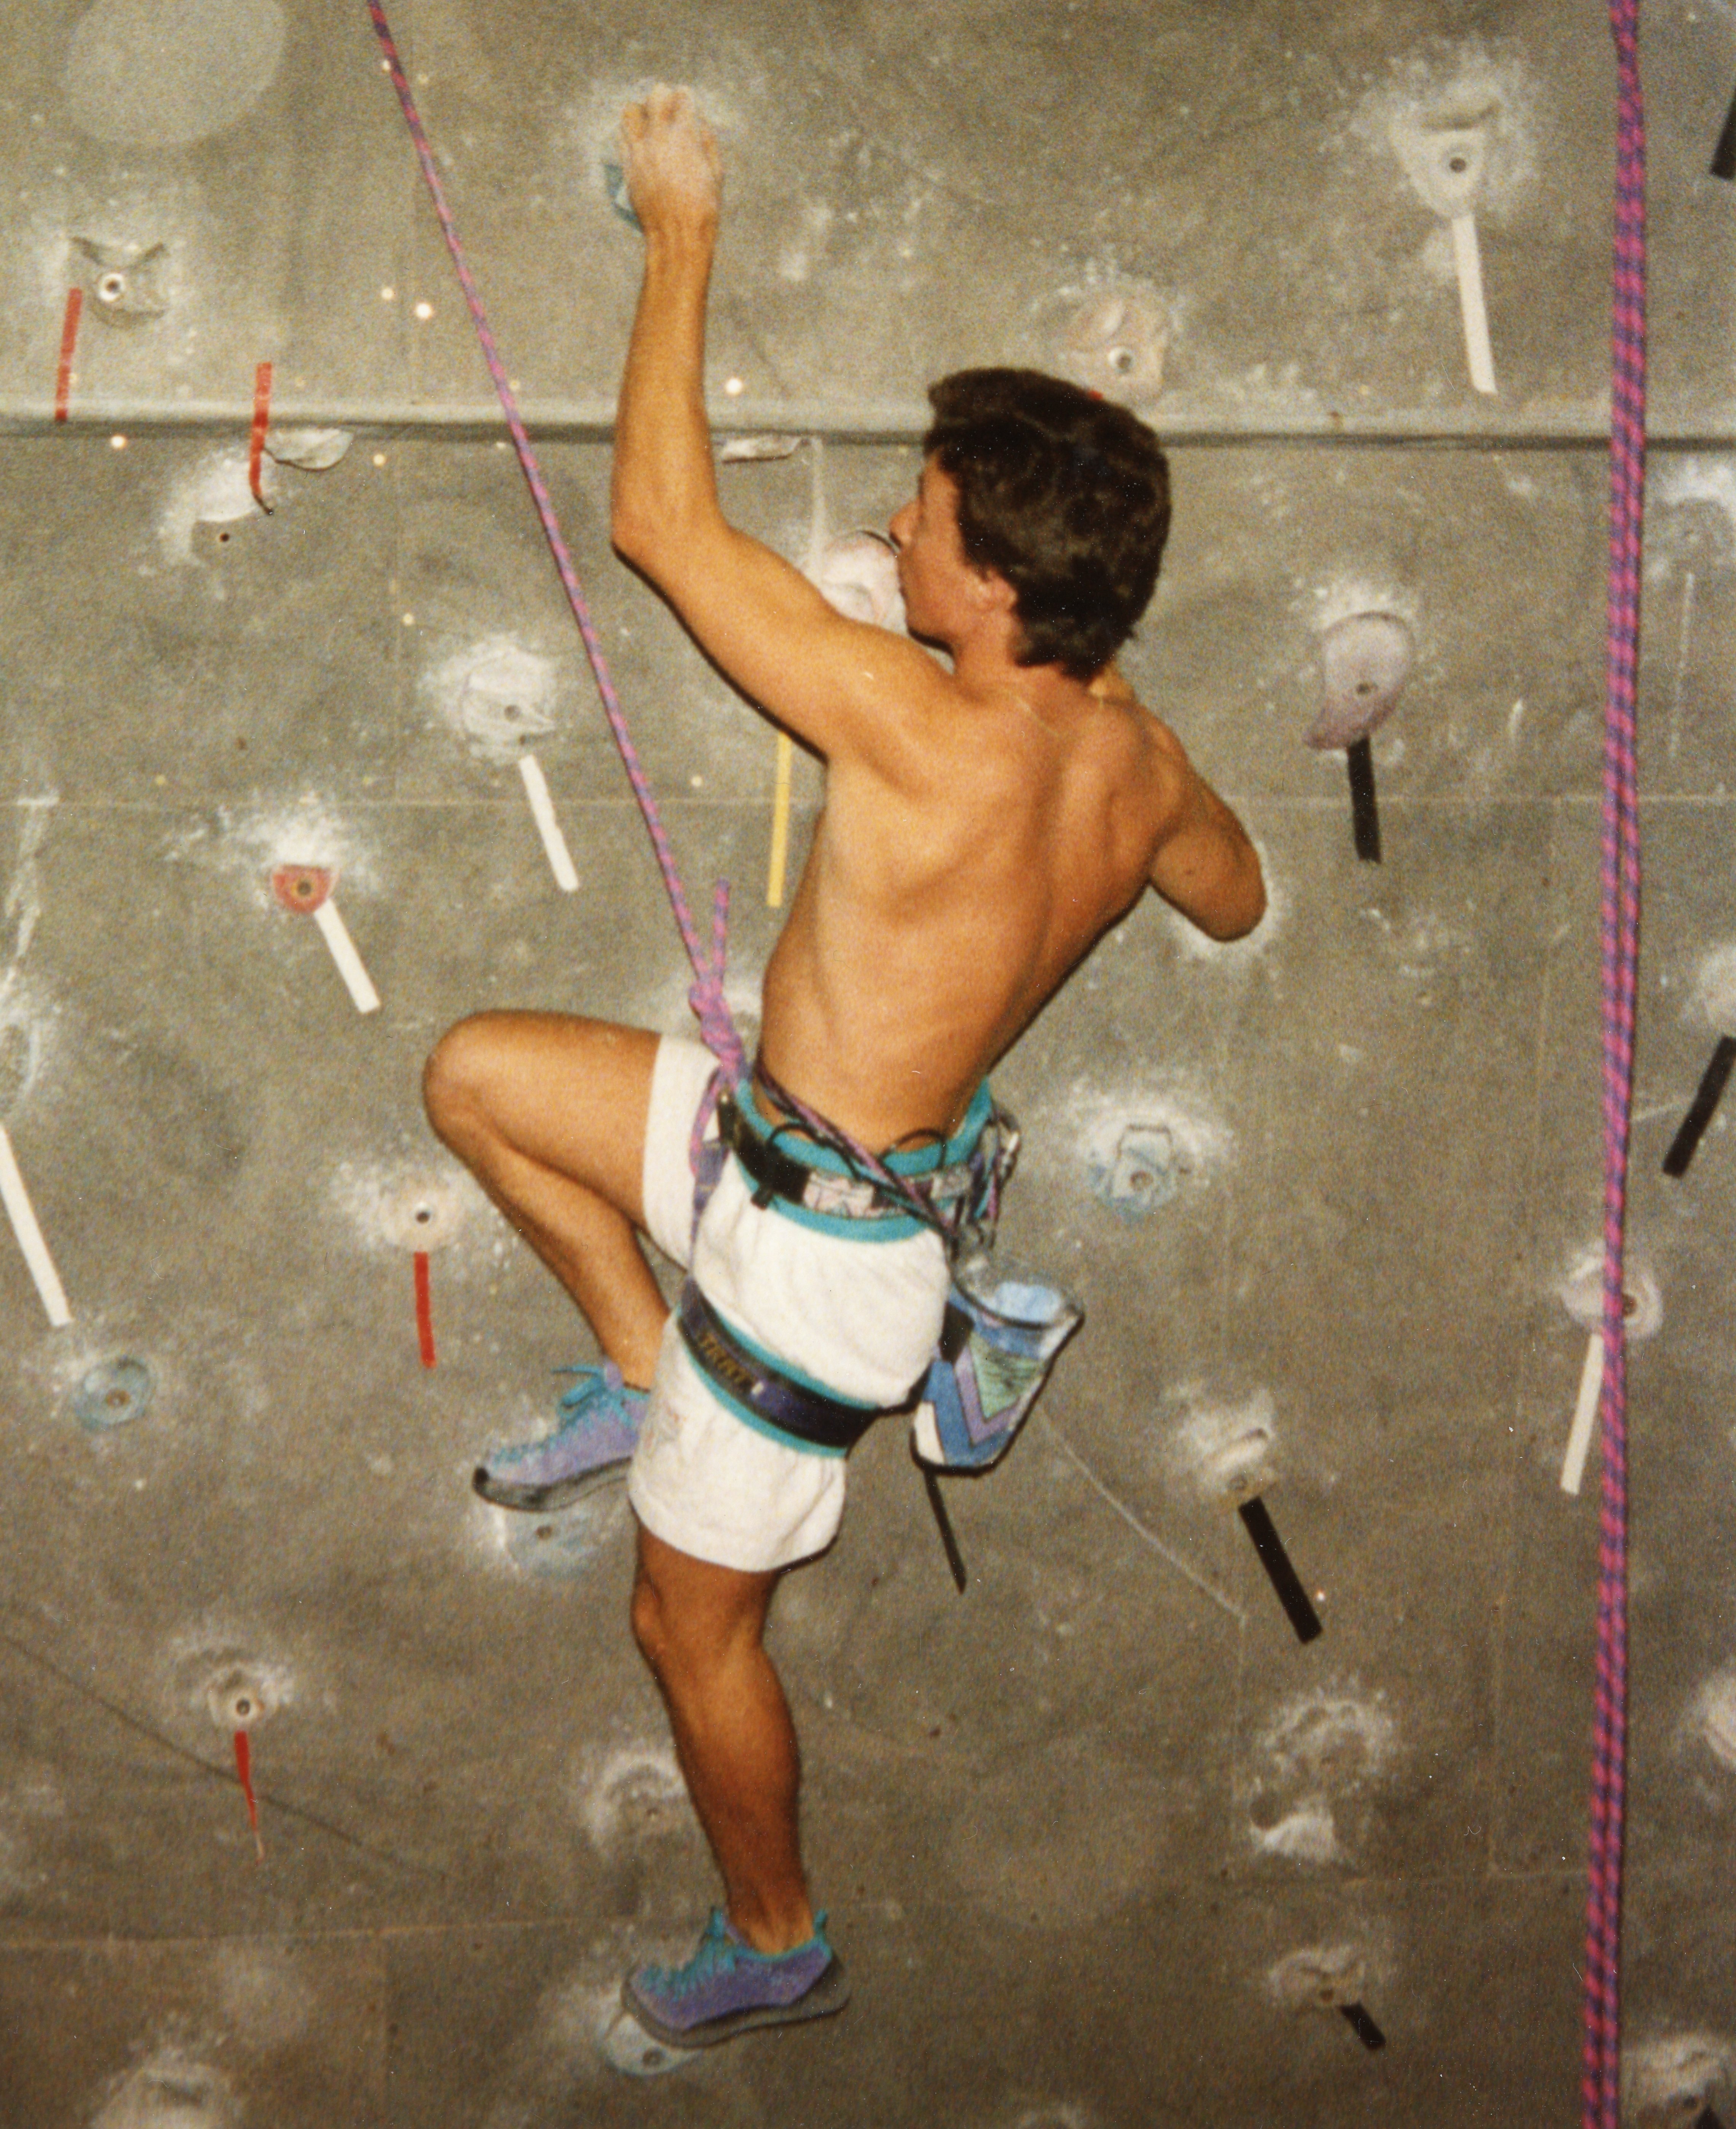
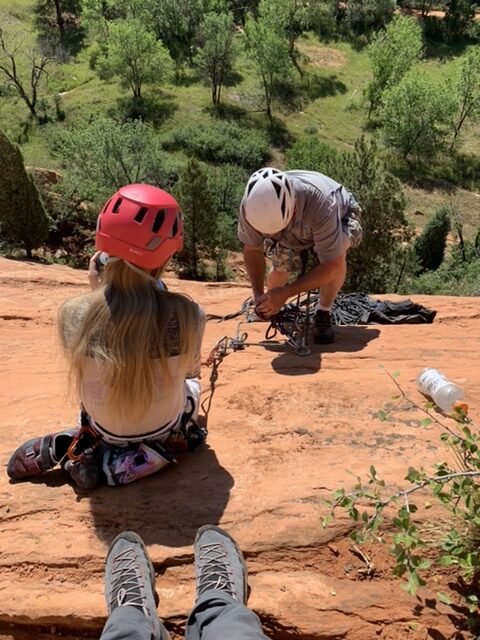
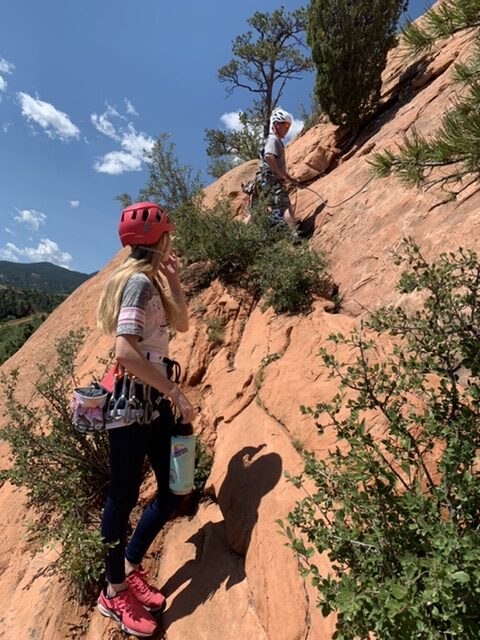
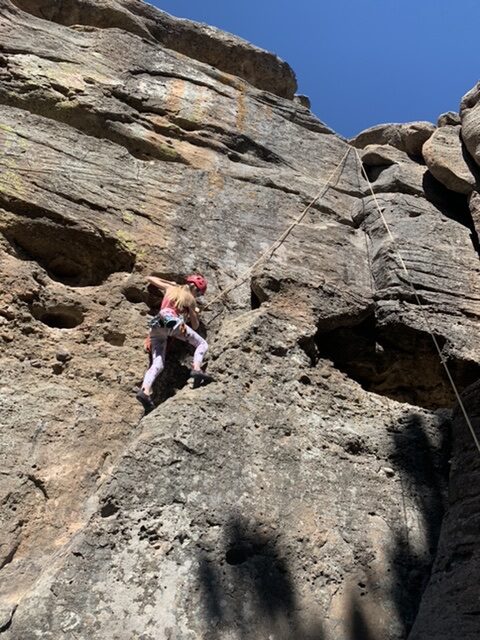
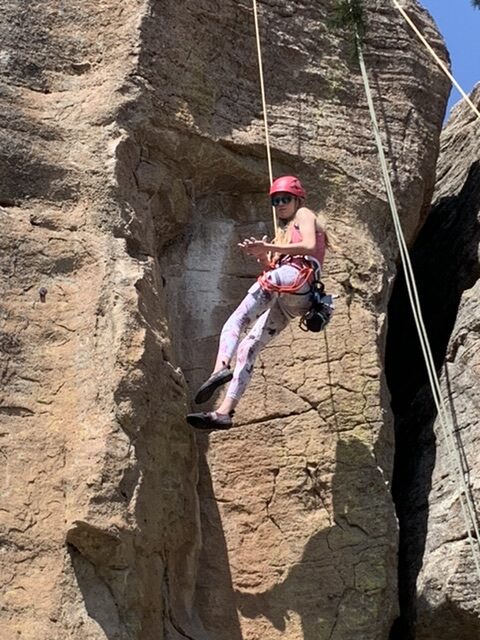
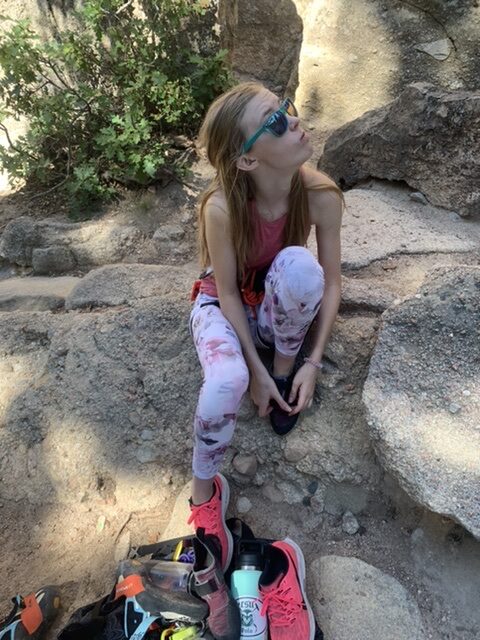
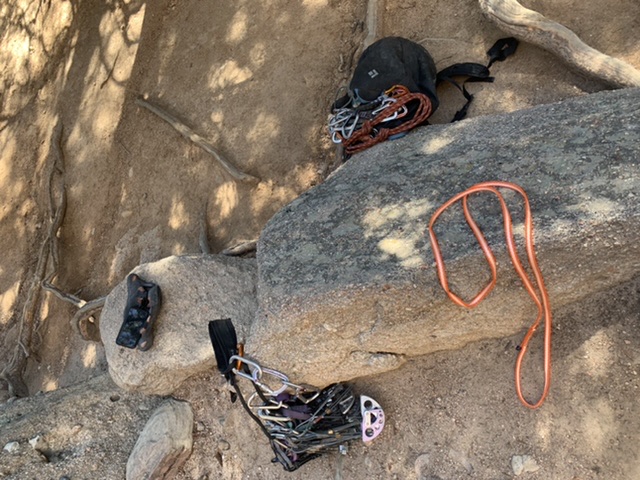
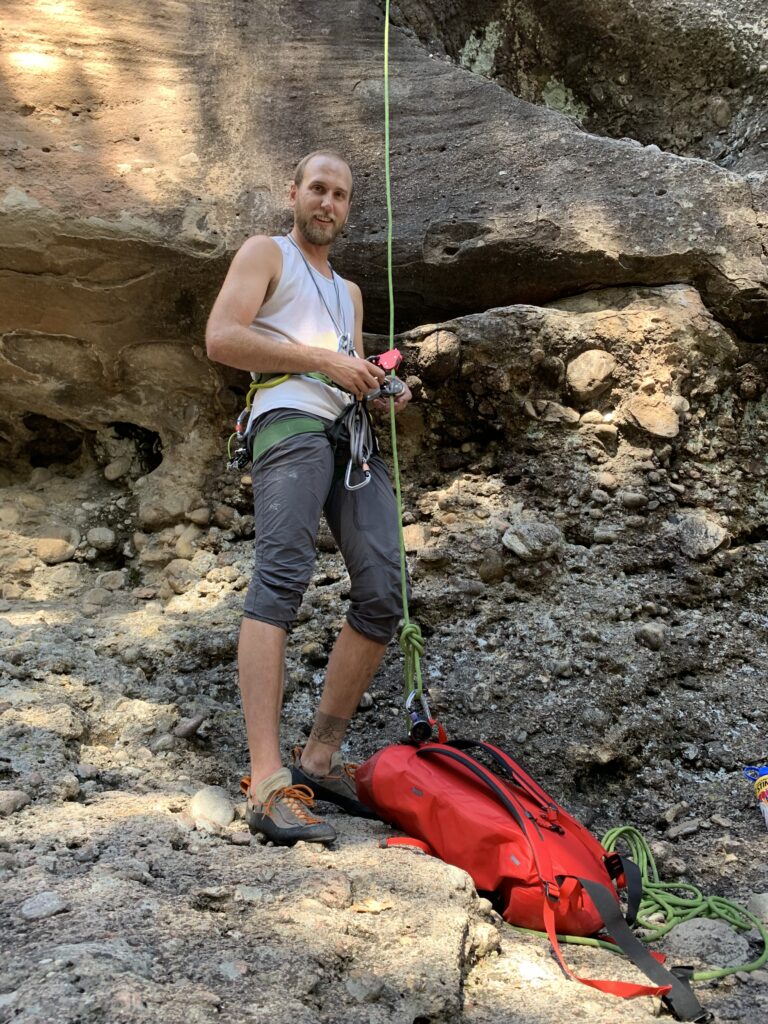
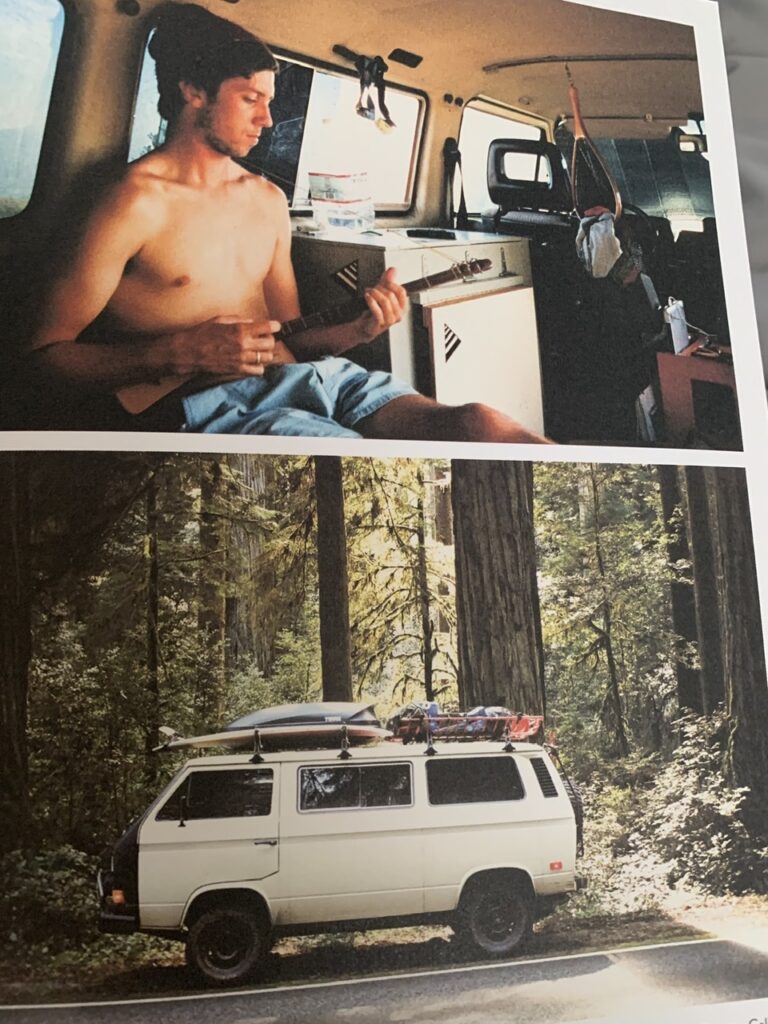
I’ve always challenged my daughter to climb a little higher and faster than I have in life. And along the way, I’ve developed a deep appreciation for the minimalist ethos of the hardcore dirtbag — the affectionate name die-hard climbers use for themselves. Eat, sleep, climb, repeat. All they need is a t-shirt, shorts, a light jacket, and a 55L pack to throw it all in. Add a pair of La Sportiva climbing shoes, some Cruzer approach shoes, a rope, a rack, an apple, some foraged greens, a melted Clif Bar or the trendy new Send Bar, a little protein powder in a ziplock that’s indistinguishable from chalk, and a handful of butter packets and saltines from the gas station — and they can sleep in their car working a project for weeks. Who doesn’t admire that kind of free-spirited, stripped-down commitment to doing something you love? It’s everything that most kids in America today are not.
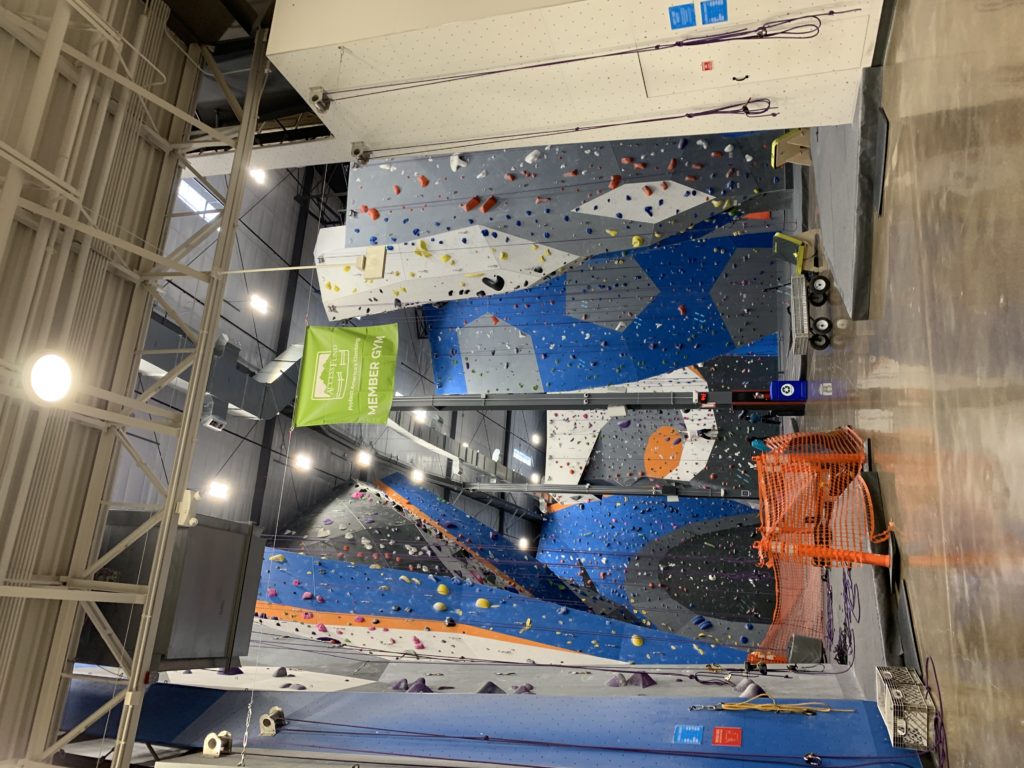
Climbing gyms, though, have changed considerably since I worked at the first rock climbing gym in the U.S. thirty years ago. I was reminded of that recently when I took our daughter to the world’s largest indoor climbing gym. It used to be a grungy dirtbag warehouse. Now it’s a social scene — youngsters working out, hanging out, and knocking out emails in the corner over a latte. There’s yoga on-site and streaming online.
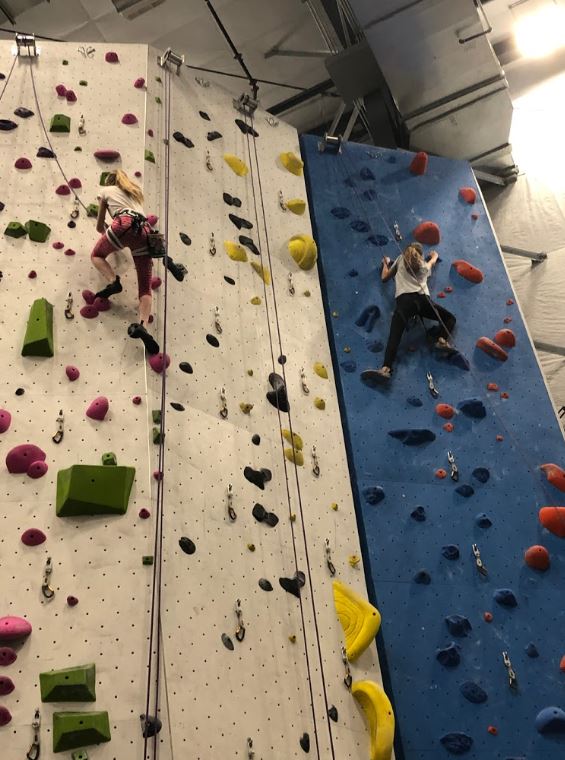
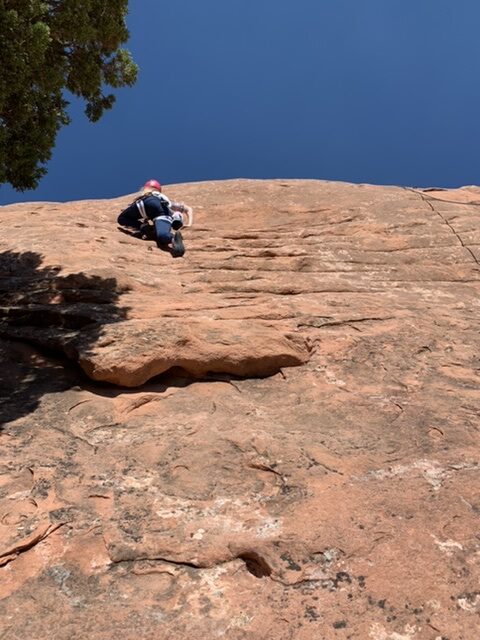
First, the climbing itself, though, has only gotten better. Routes go higher on bigger walls, and the problems are more creative than ever. Holds are color-coded by difficulty now — gone are the days of all-grey rocks with a strip of electrical tape on the wall beside them.
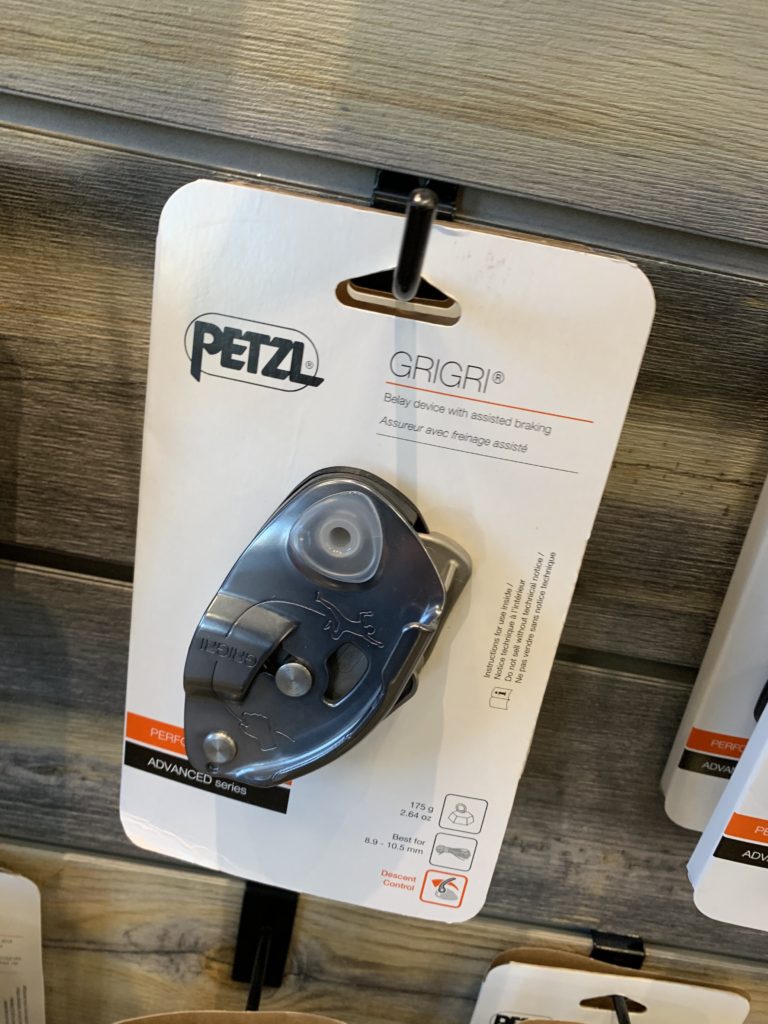
Second, the gear has evolved too. Figure-8 belay devices are largely a thing of the past, replaced by GriGris and ATCs. My daughter climbs at Montana State, where their gym uses ATC Pilots exclusively. I’ve been eyeing the new Neox — it may actually outperform the GriGri for belaying lead climbers, and I want to get my hands on one.
Third, harnesses are still largely the same, but more focus has been put on design and comfort, with the addition of new buckles that do not require doubling back, as the old ones did. Neptune Mountaineering and REI are still around as the major suppliers here in Colorado, but new stores such as Sportiva, Wilderness Exchange and others have come along, providing a number of different brands to try out and hang in, before buying gear.
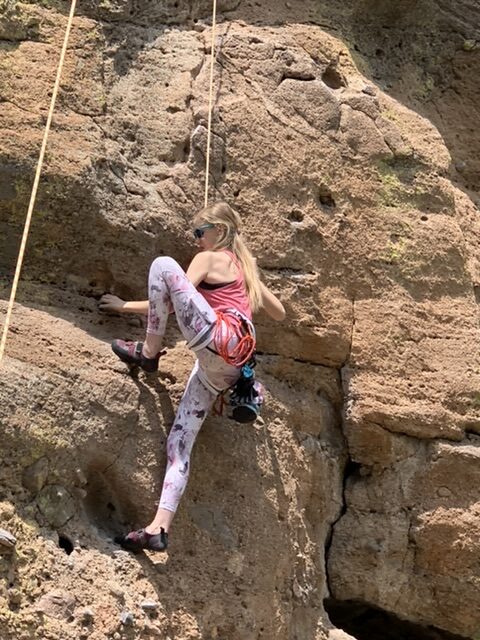
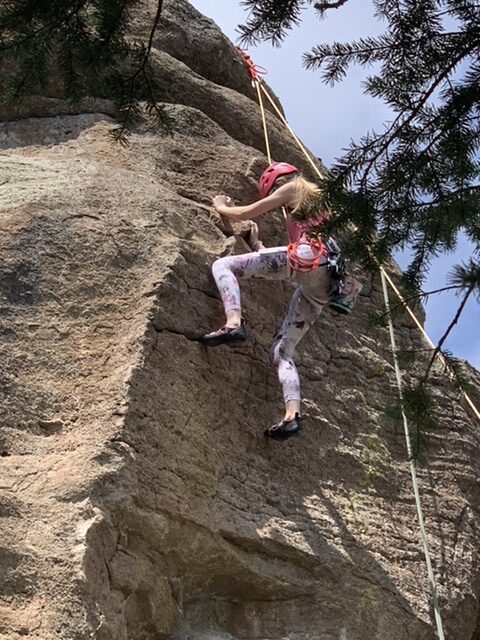
Fourth, shoes have gotten even better, they are more comfortable and more sticky with much better edging, such as the La Sportiva Otaki. These La Sportiva shoes are vastly more comfortable and better on edge work than the Five Tens back in the day. Try Alex Honnold’s favorite climbing shoes.
Fifth, gone are the days of using Carmex to fix your blistering hands (which by the way still works as good or better than most of these new $15 jars of largely the same ingredients added with beeswax instead of petroleum), but the tins of homemade balms are in, as are all kinds of climbing lotions and potions. They are fun to try out and work well. We are going to try making our own, see the recipes below.
Sixth, the method of belaying has changed to the PBUS from the SSS method that I was taught. This is safer in theory, but slower in practice than the SSS method, which makes it especially impractical for speed climbing, etc.
Seventh, training recommendations used to be, “Wear tighter shoes, climb a lot, do lots of pull-ups, join a gym, work on projects, get even tighter shoes, do more pull-ups, eat fewer calories and lose weight, two more pull-ups, hang on a fingerboard, train harder, climb some more, start campus training, even less, climb even more…“ Which has now changed to the best training for climbing is skills climbing. And climbing skills training and speed training, and wasted energy and time are lost forever. Cross training into yoga and fitness are also more popular than ever. And attaining the 5.12 is easier than ever for the non-professional due to all of these improvements. The numbers don’t really matter, it’s pushing your boundaries that counts. Do some mild stretching and warm-up and then start climbing some easier warm up routes before you try for something more serious and start to get pumped.

Eighth, climbing clothes have vastly improved thanks to Boulder Jeans, Arc’teryx, North Face and lots of other stretch fabric makers. But, overall, climbing still remains the simple passion that it was during my youth and not a lot of specialize equipment or clothing is necessary, especially for gym climbers.

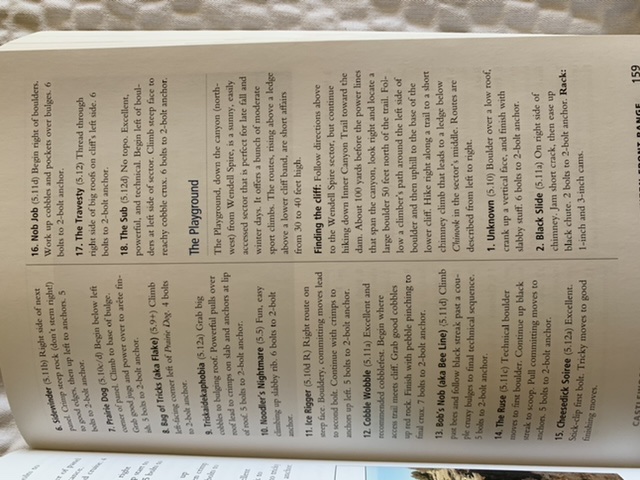
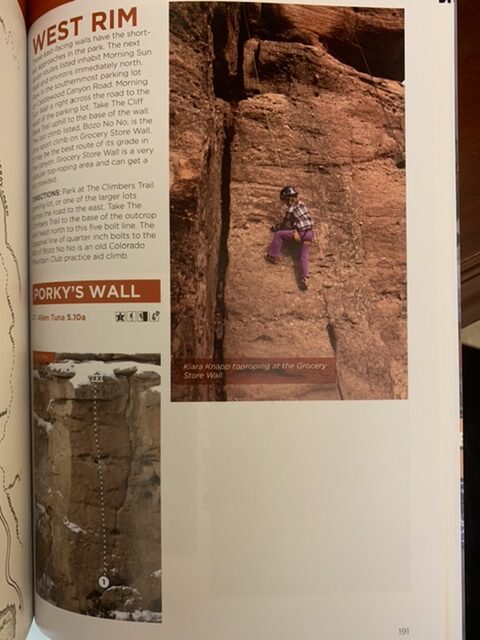
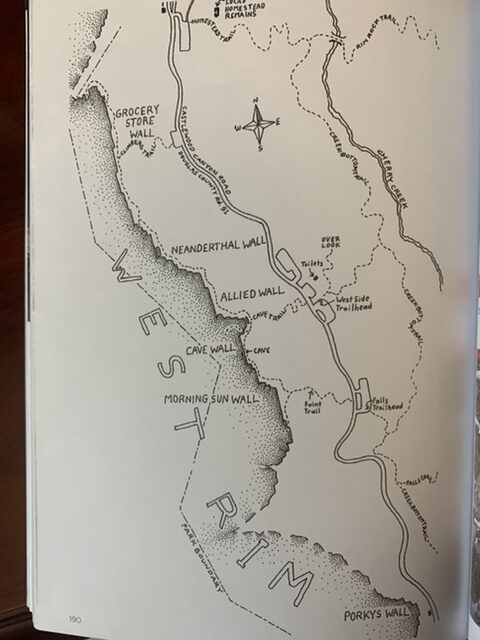
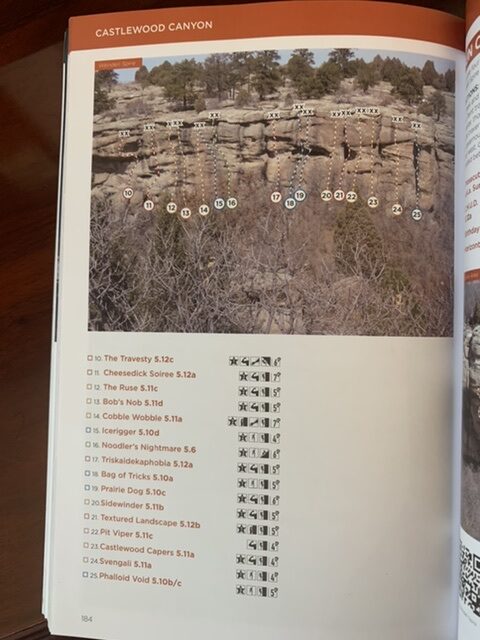
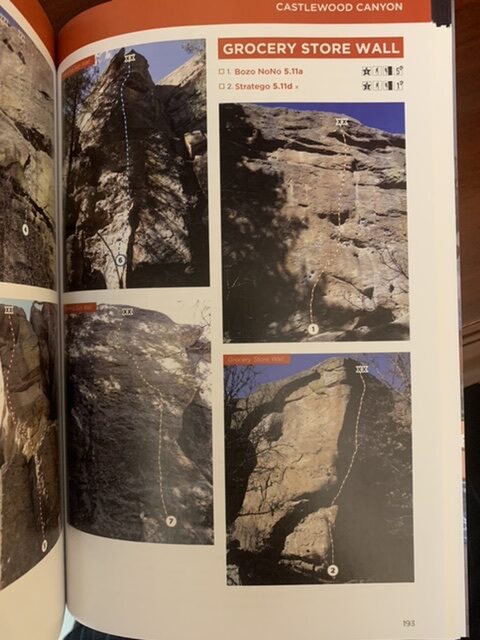
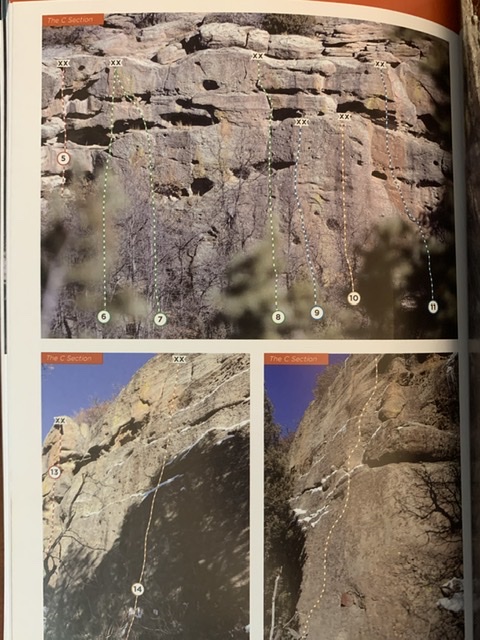
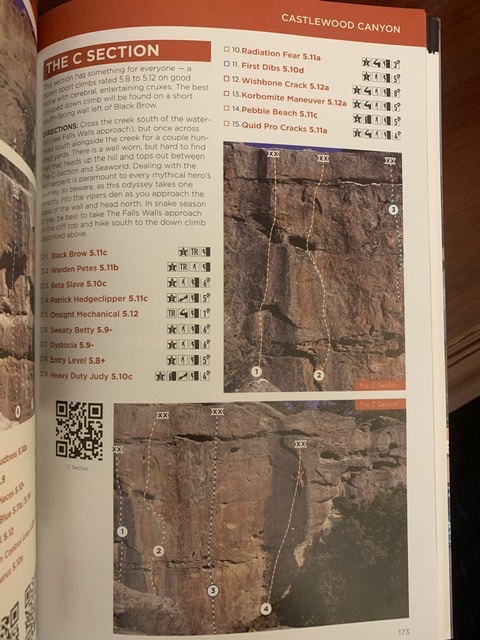
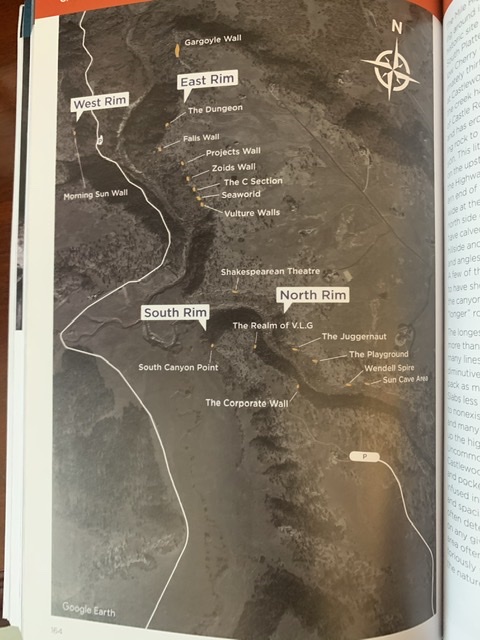
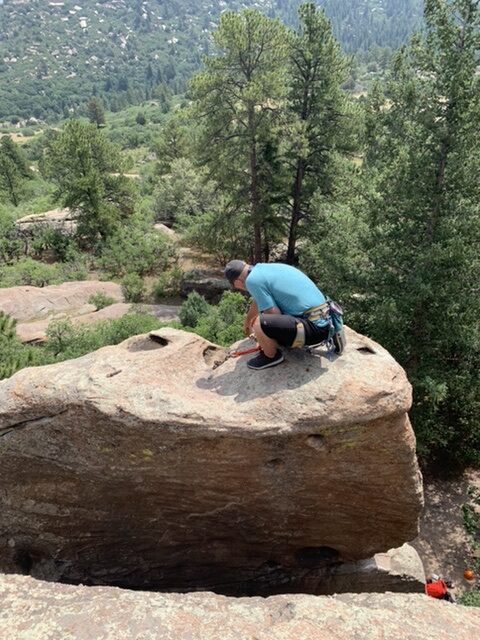
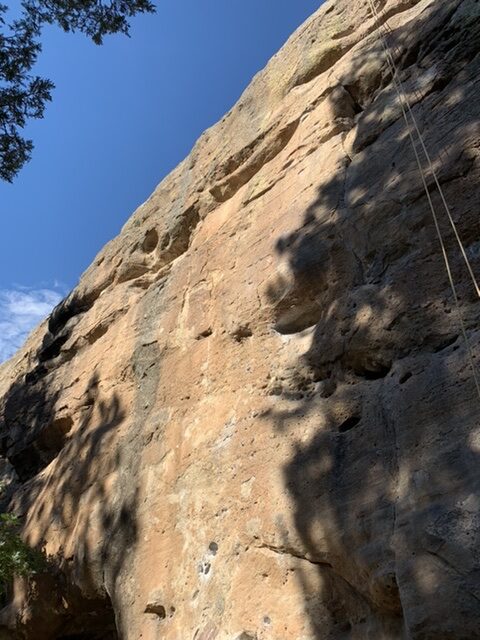
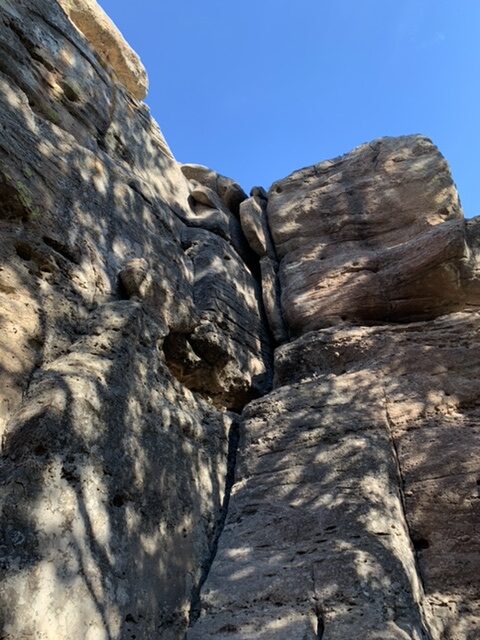
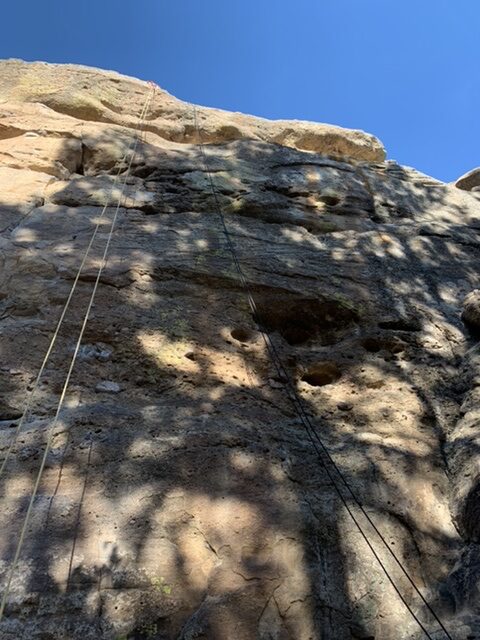
The rest remains the same, climb quietly (looking before you place your foot using your toes not the middle of your foot and not scraping up the wall), push don’t pull your way up (get your feet up first), try not to make two adjustments when only one is necessary (climb efficiently and relaxed) using full arm lengths to rest on bone (not curled arms which requires more muscle) and have fun climbing onto new adventures practicing your flagging, smearing, edging and crimping along the way. It’s about setting a goal for yourself that you think is impossible and then you do it. Then, you move onto the next challenge. For us, it has been Grocery Store Walls at Castlewood Canyon.
From the EDGE BLOG
Hands Down: A Better Belay
Written By Tod https://www.edgeworksclimbing.com/blog/hands-down-a-better-belay/
It’s always interesting to see the different techniques that people use to belay; generally the differences stem from when the person was taught or when that instructor was taught themselves. Belay methods have evolved over the history of climbing as equipment improved and the knowledge of how to use that equipment has improved. Unfortunately as all that improvement occurs, someone who has already learned how to belay doesn’t always update their methods. Thankfully there are many different ways to belay, old or new, that are still safe (and contrary to rumors, there are many ways to pass a belay test).
—————————————————
BELAY HISTORY 101:
So what has changed? From the beginning, belaying took leaps and bounds in safety when it moved from the Hip Belay (no equipment other than the rope wrapped around your hip!) to incorporating equipment like harnesses and carabiners and using a knot/hitch called the Munter Hitch to provide friction. Eventually instead of belaying using a friction hitch, belay devices such as stitch plates and then tuber devices (i.e. Black Diamond ATC) were introduced; this improved the effectiveness of the belay even further. What didn’t change was that way you handled the rope was still very much the same as if you were still doing the Hip Belay.
This belay method that has been used for decades (if not well over 100 years) is often times called the Hands Up or the Slip Slap Slide method; basically it is the method where you hold both hands up in front of you in order to belay. It was the only way to do a Hip Belay, and it worked well as the belay equipment evolved. It is a safe belay method (when managed properly) and it is still used today (though very much fading from use).
—————————————————
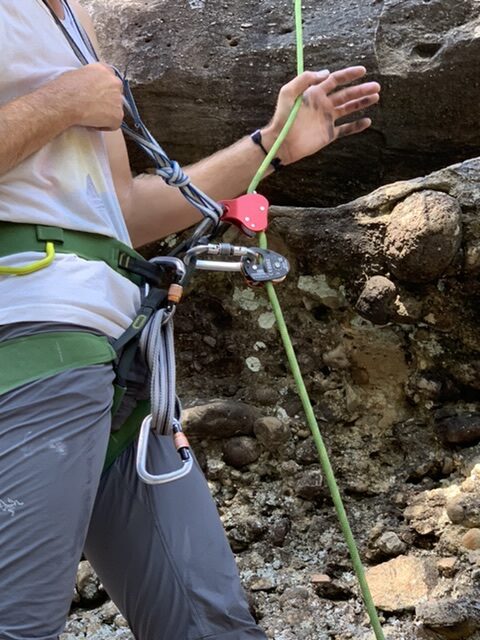
Sometime in the early 2000’s a new belay method came into vogue called the Hands Down or the PBUS. This method caught up to and made better use of today’s belay devices by using a hands down method that keeps the your hands below the belay device. This method is now the standard for climbing gyms, climbing schools and guide companies to teach. Anyone receiving professional instruction will most certainly be taught this method.
So what is PBUS and what’s different? PBUS stands for “Pull, Brake, Under, Slide” and the major difference is that the brake hand is UNDER the belay device in its resting position thus the device is always locked and ready to catch a fall, unless you are pulling rope. With the old Hands Up method, the belay device was always in the open/pulley position, and the only way to catch a fall was to engage your brake hand downward.
How can you tell the difference?:
Hands Down (Pull, Brake, Under, Slide): (1) Your brake hand thumb is closest to the belay device when gripping the rope; (2) Your hand naturally rests below the belay device; (3) The Belay device is naturally in the locked position to catch a fall.
Hands Up (Slip, Slap, Slide): (1) Your brake hand pinky is closest to the belay device when gripping the rope; (2) Your hand naturally rests above the belay device, leaving both hands and both ropes parallel to each other; (3) The Belay device is naturally in the unlocked/pulley position, unable to catch a fall.
| Hands Down (PBUS) | Hands Up (SSS) |
The Hands Down (PBUS) method was a dramatic shift in effectiveness of the belay by allowing new and non-attentive belayers to catch falls without making an action to brake (they already are!). A side benefit was that it also increased the strength of the belay hand by putting stronger fingers (pointer and middle fingers) in the position of strength/grip rather than the pinky and the ring fingers.
If you haven’t seen the Hands Down (PBUS) method have one of the Edgeworks Staff demonstrate it, or take a look around at other belayers, you are sure to see the majority of them belaying Hands Down a better method.
Climbing Skills: PBUS Belay Method For Top Rope Climbing from CMRCA on Vimeo.
Climbing Lingo


DIY Climbing Balms vs Store Bought
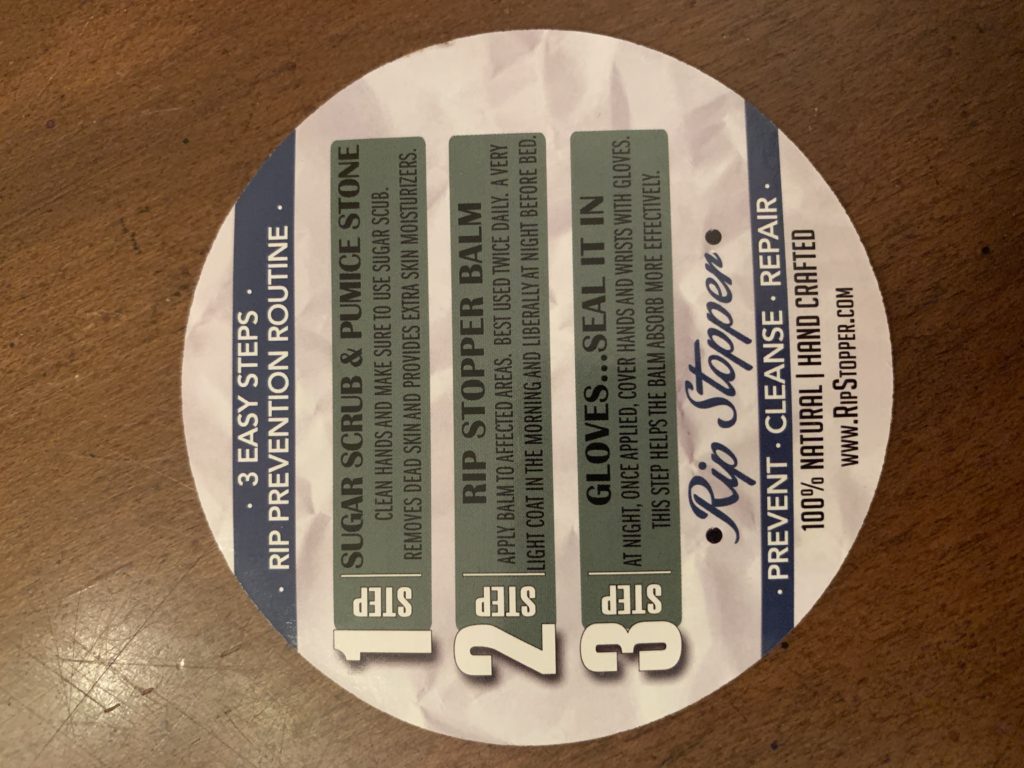
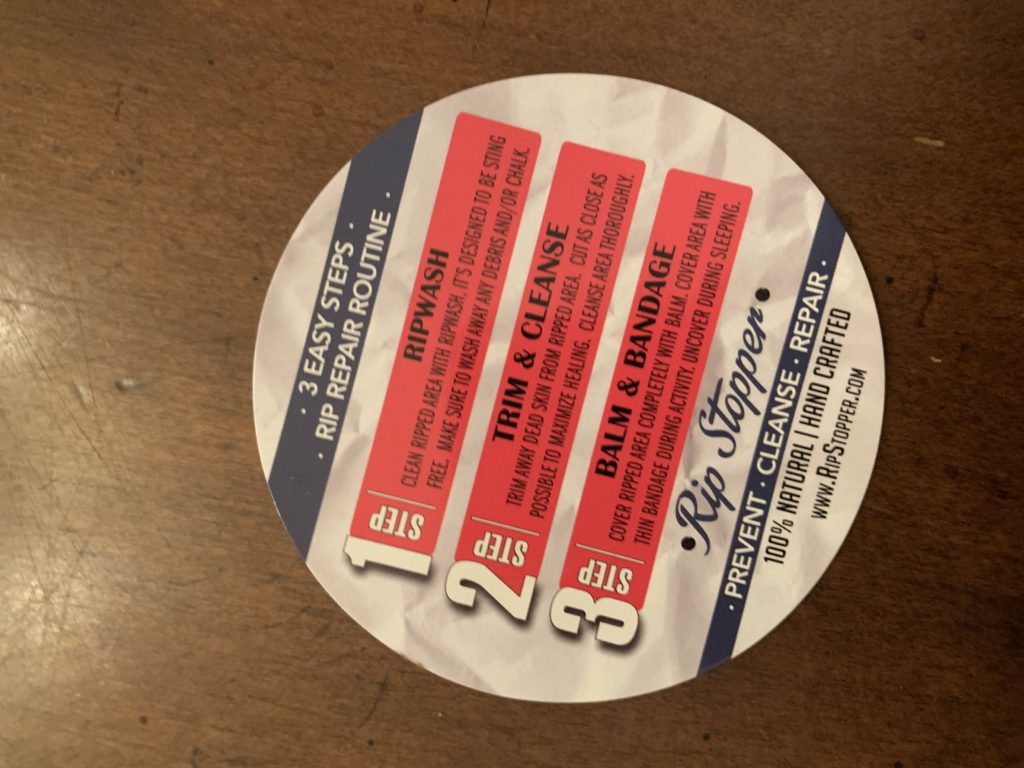
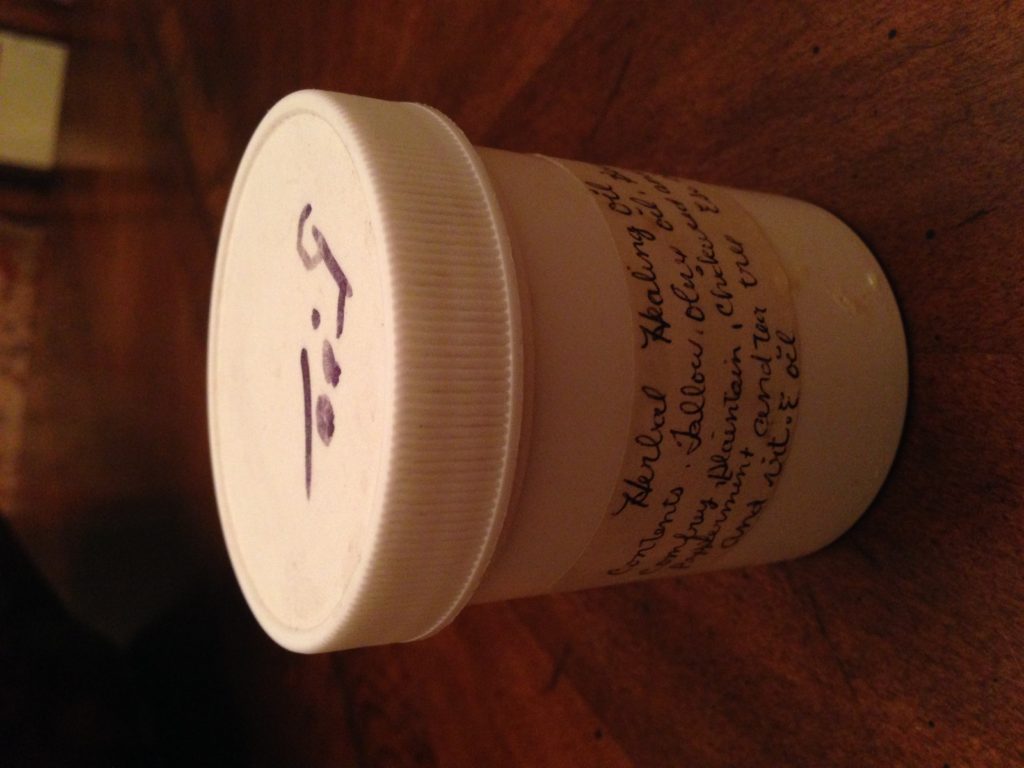
There are a number of commercial products for climber’s hands. The best of which is Climb On, but we rate them in the following order. Some are more medicated than just conditioning and for that the Boulder Balm stick is the best of those we have reviewed. In the end, they are all pretty similar to my favorite hand salve of all time, made by a friend who is an Amish farmer and horseman (talk about hard working man’s hand) but his salve features tallow instead of bee’s wax, but the comfrey, plantain, chickweed, and vitamin E are all common ingredients to thee balms.
BEST SKIN CONDITIONERS FOR DRY CLIMBING HANDS


BEST MEDICATED PAIN RELEIVING


BEST FOR ACTUALLY REPAIRING RIPPED SKIN


MOST AFFORDABLE OPTION

O’Keeffe’s Working Hands Hand Cream, 3.4 ounce Jar
DIY CLIMBING SALVE BARS
Equipment
– Heat proof bowl and pan for double boiling
– Spoon or something for stirring
– Moulds, jar, tub or container to store balm
So to make a solid balm the most important ingredient is bee’s wax. There’s bound to be somewhere near your home that sells it, which is nice because it’s naturally made by your local bees, but if not then Amazon has a good one from Your Natural Planet. Some kind of oil is needed too for moisturising, you can use olive, avocado, coconut, or whatever oil you have on hand, such as tallow. You can stop there and it would make a decent, solid balm. On the other hand the list is kind of endless for what you can add in like essential oils, herbs, etc. The recipe below is a pretty basic antiseptic one, which I chose as it is extra effective on cuts and grazes. Just remember to have equal parts of everything, and 1 drop of essential oil for every 2g/ml.
Ingredients
– Shea butter – 25g
– Bees wax – 25g
– Tea tree oil – 12 drops
– Olive oil – 25ml
1. Fill the pan 1/4 of the way with water and bring to the boil. When it’s boiling, reduce the water to a simmer and fit the bowl into the pan. The bottom of the bowl should not reach the water. Add the Shea butter and bees wax and let them melt, stirring occasionally.
2. It takes about 10 – 15 mins, but once the butter and wax have melted together, take it off the heat and add the olive oil and tea tree oil, gently mix it all together.
3. Quickly pour your mixture into the container/mold of your choice. I tried to make a wick with string for in the container to make it easier to remove from the tub, but as you can see it didn’t work. I think if it had something to strengthen the string it could be a option to get the balm out of the container in one piece. However, the silicone cupcake mold worked great to make a loose bar, so I recommend using these or something similar.
4. If you get impatient and prod your balm before it has set like I did, you can heat it back up in the microwave if the container it’s in is safe to do so. It will liquefy again and you can fix it back up. When it has cooled down for about 20 minutes, you can speed up the setting process by popping your balm in the fridge for another 20 minutes.
5. Once it feels firm and has completely set, you’re good to take your creation out of the mould and marvel at what you’ve made.
I found that you only need to use a little bit of this balm as it starts to melt on contact, and after about 5-10 mins it has all soaked in leaving a lasting feel of moisture. The loose bar is easier to use than the broken pieces, but they both get the job done and make your hands feel great.
Let me know if you try this and what ingredients you use!
_____________________
DIY Palm Balm for Rock Climbers
20g | 0.7oz beeswax
20g | 0.7oz shea butter
8g | 0.28oz calendula infused oil
8g | 0.28oz comfrey root infused oil
8g | 0.28oz plantain infused oil
1g | 0.03oz vitamin E oil
5 drops roman chamomile essential oil
2 drops helichrysum essential oil
6 drops lavender essential oil
5 drops cedarwood essential oil
4 drops tea tree essential oil
Melt the beeswax, shea butter, and herb-infused oils together in a small saucepan over low heat. Remove from heat and stir in the essential oils. Pour into shallow tins and use on small scratches and wounds.
___________________________
Another tip, put your climbing shoes in the freezer overnight to kill foul smelling bacteria.
https://www.youtube.com/watch?v=9liByriQRag&feature=share
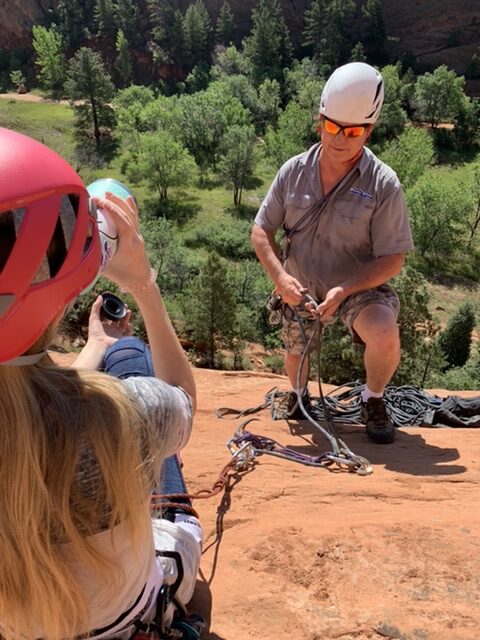
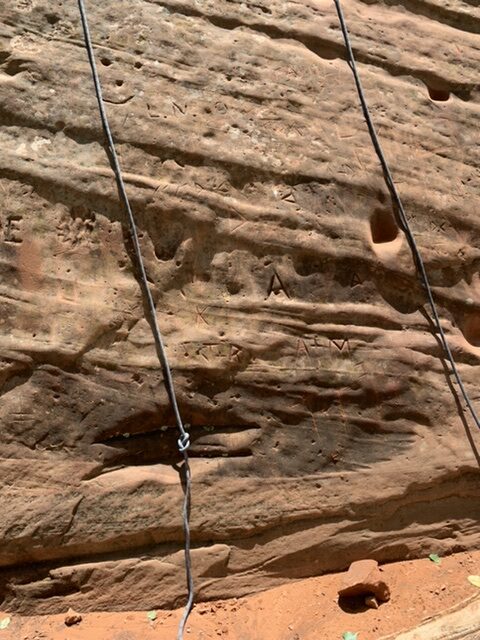
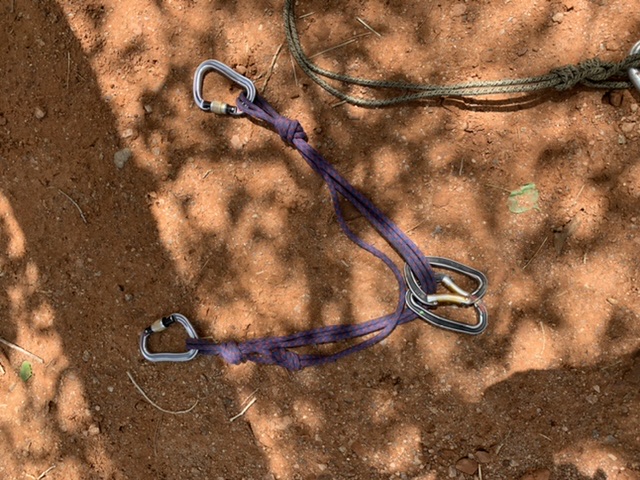
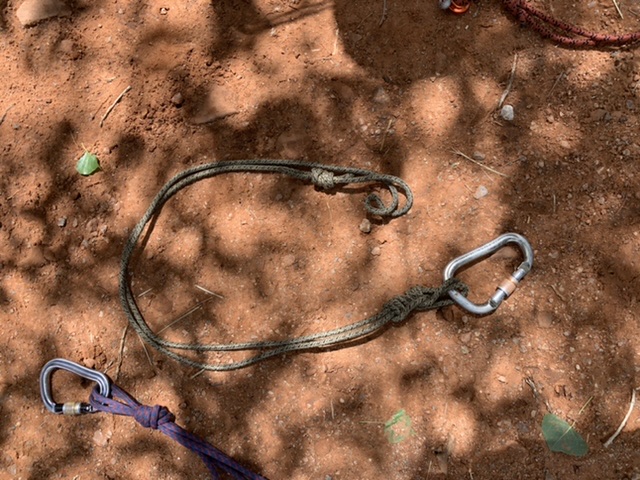
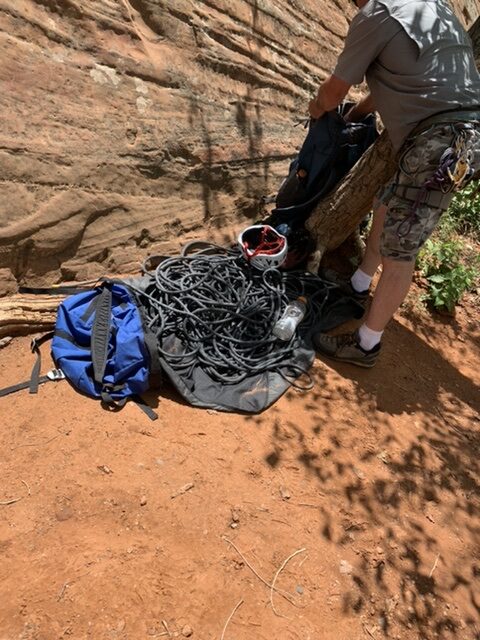
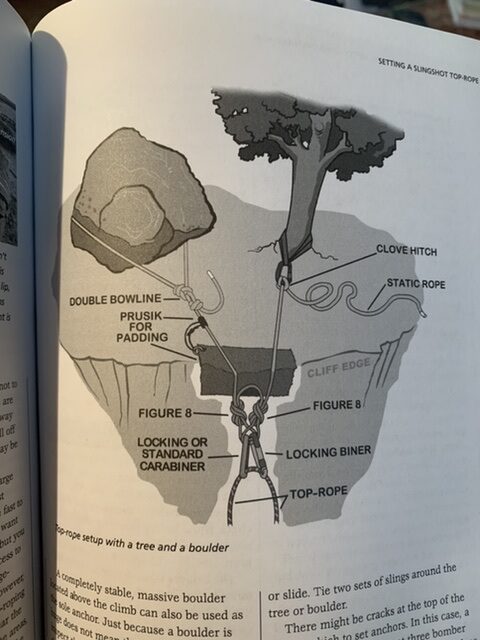
https://climbtallpeaks.com/set-up-top-rope-anchor/
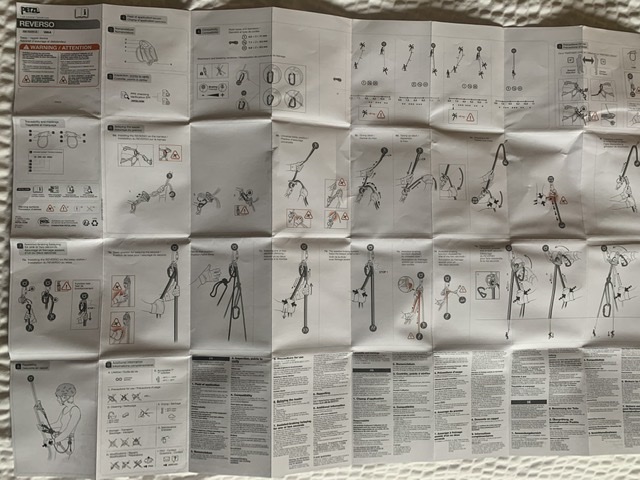
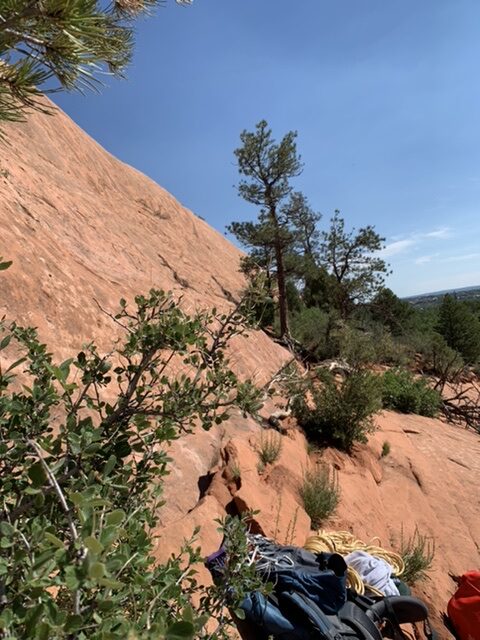
Our ropes:
Sterling Super Static 2 3/8″ 200′ (61M) rope.
Sterling Rope, Evolution VR9 Orange 60M, NEON ORANGE, 60 M Dynamic climbing rope.
Sterling 7 mm accessory cord is better than Blue Water as it is nicer quality and more supple.
Our knots:
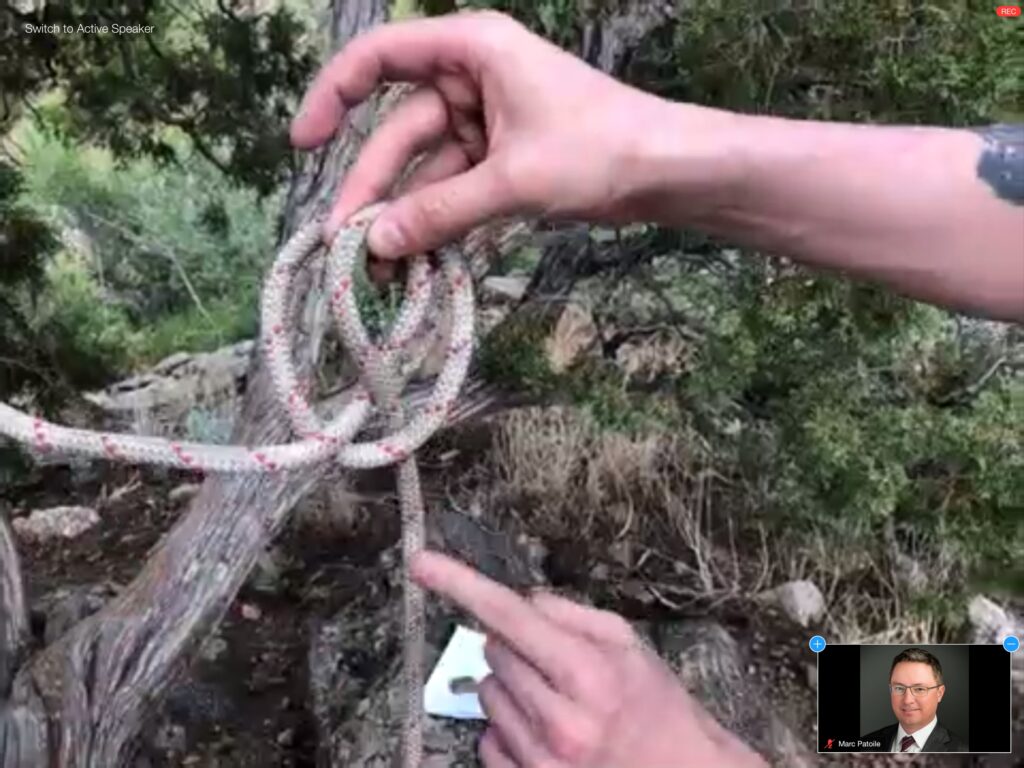
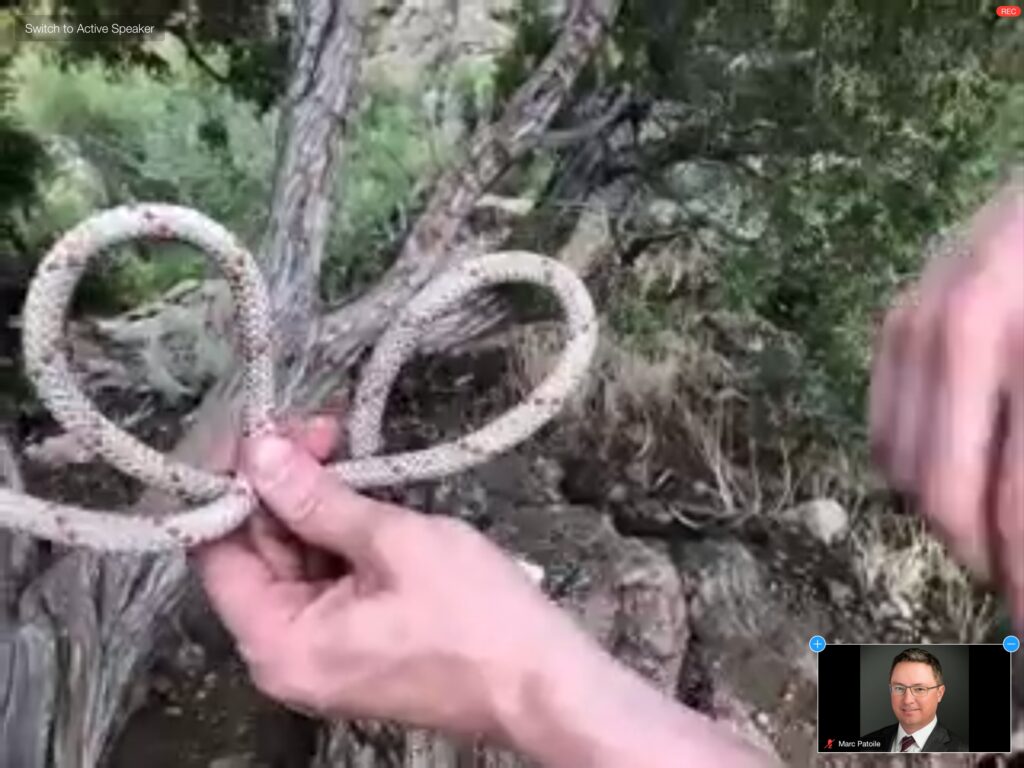
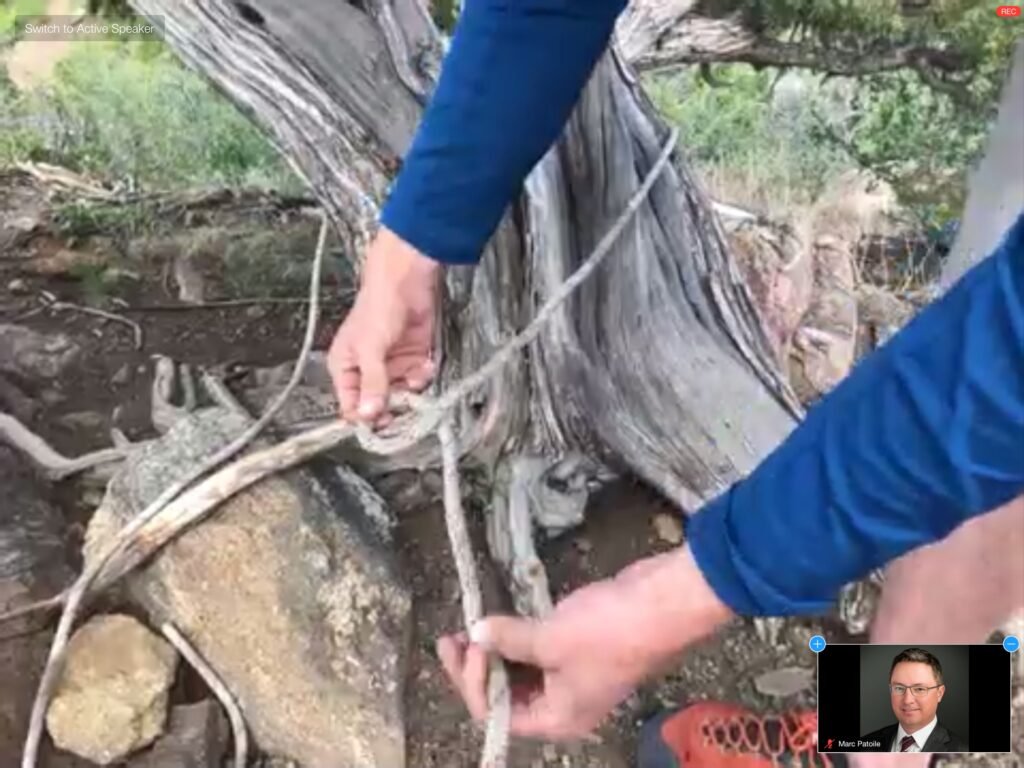

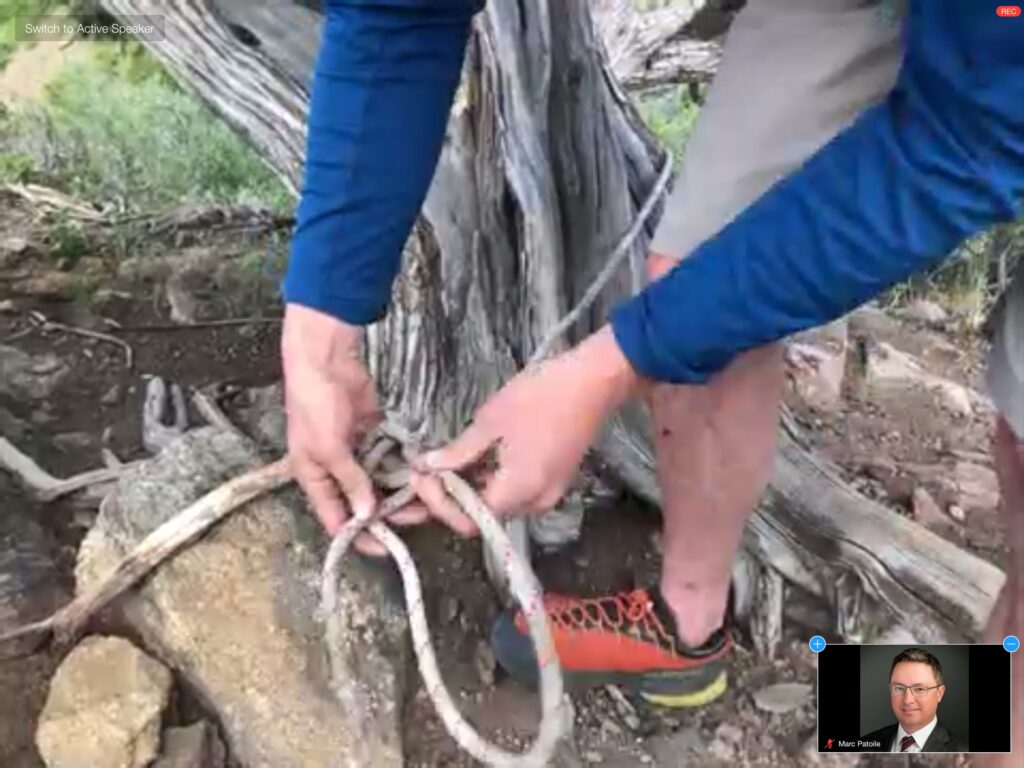
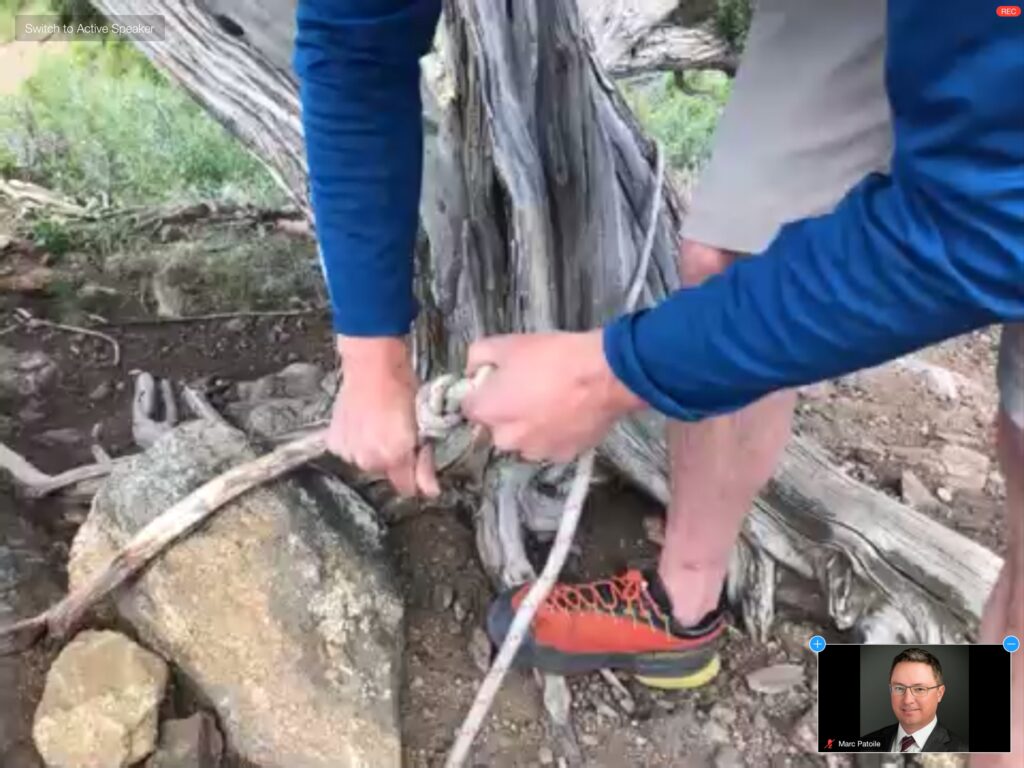
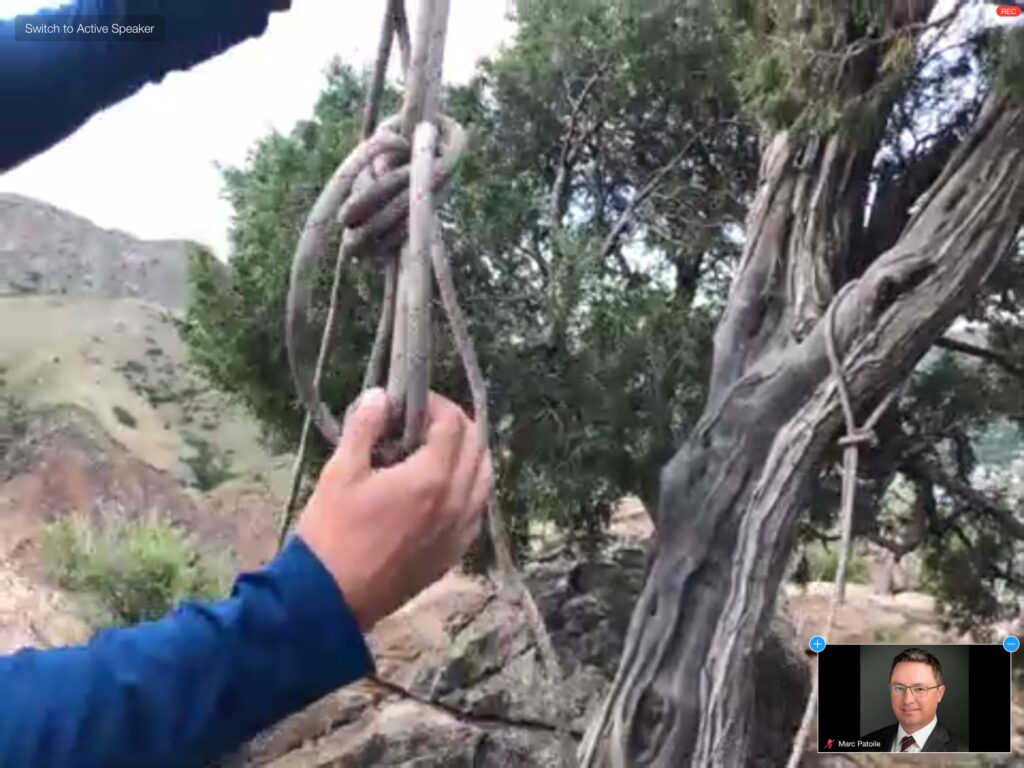
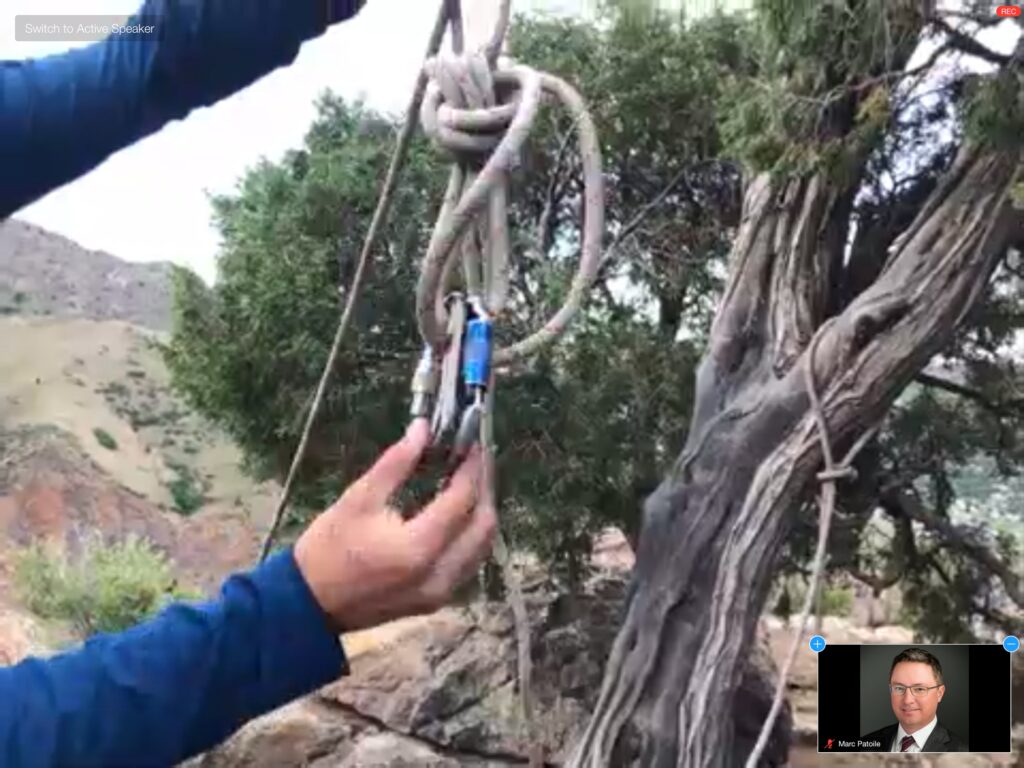
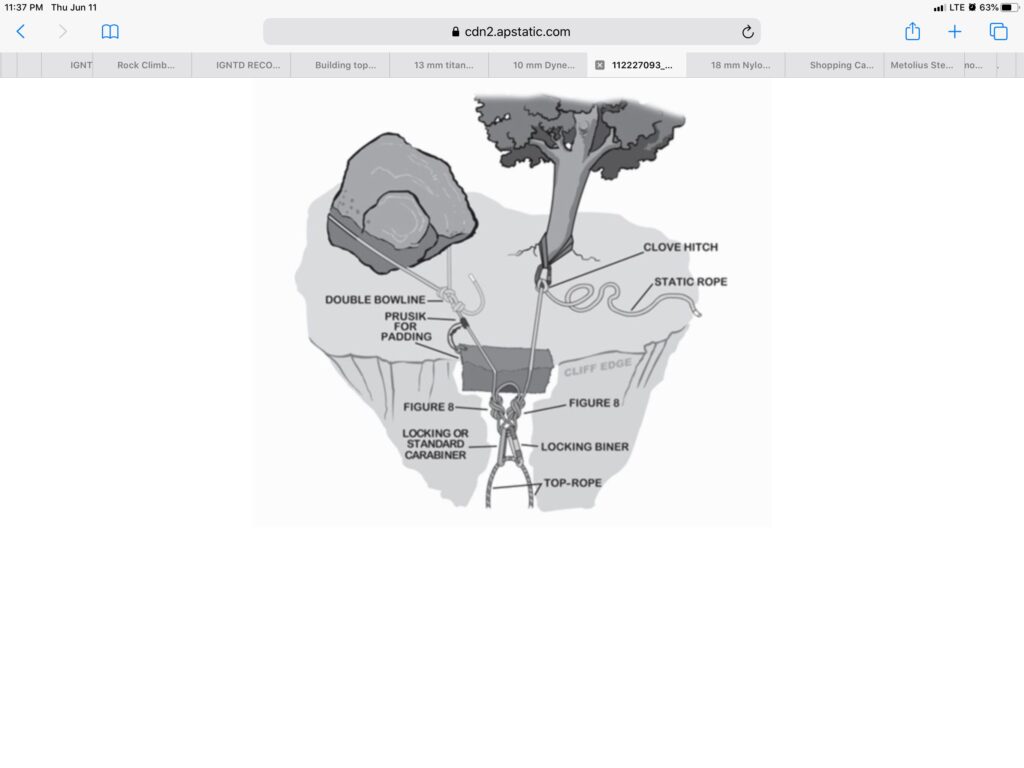
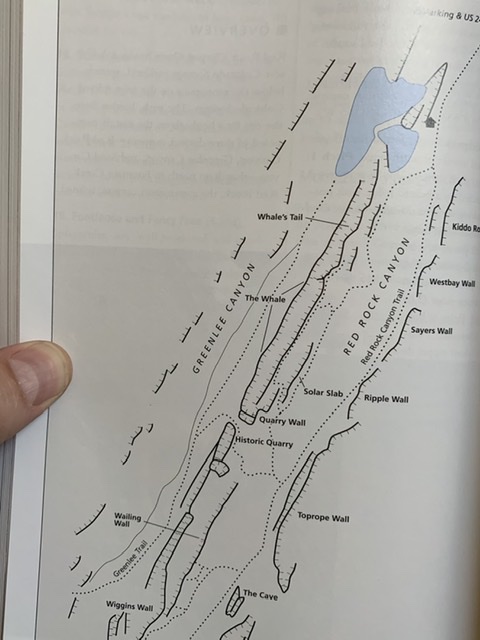
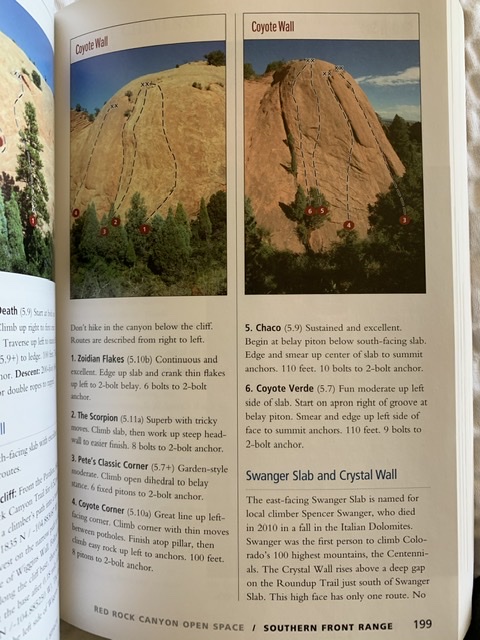
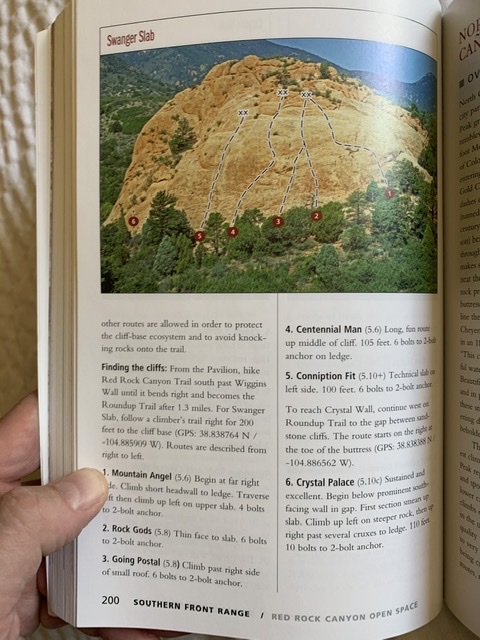
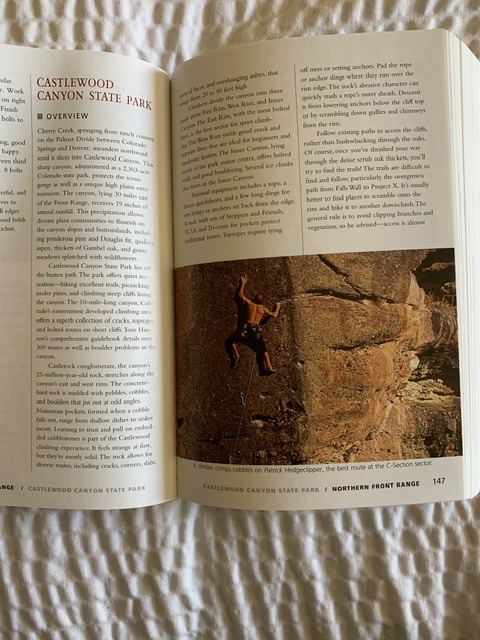
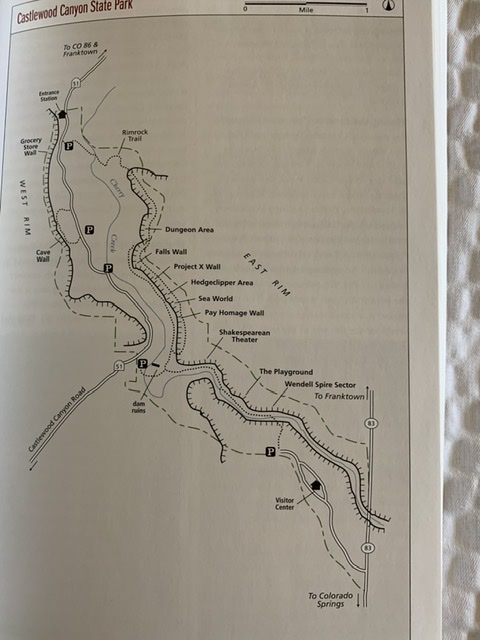
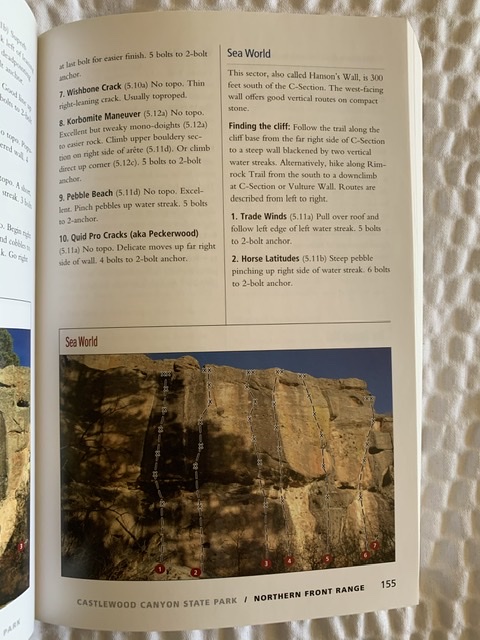
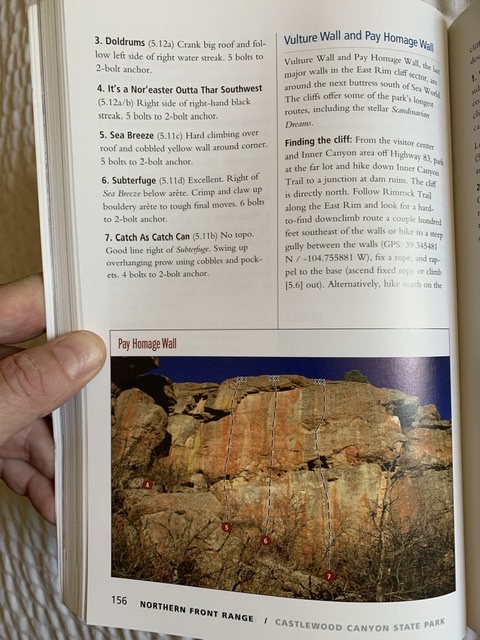
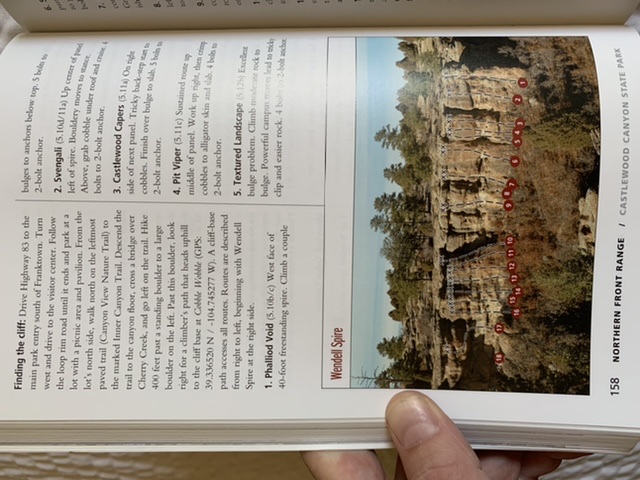
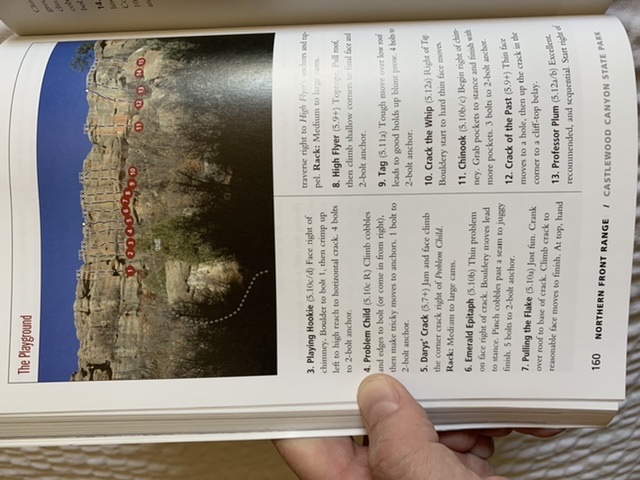
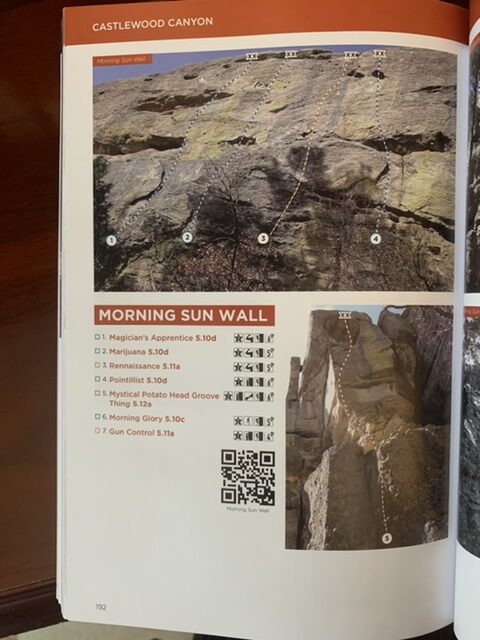
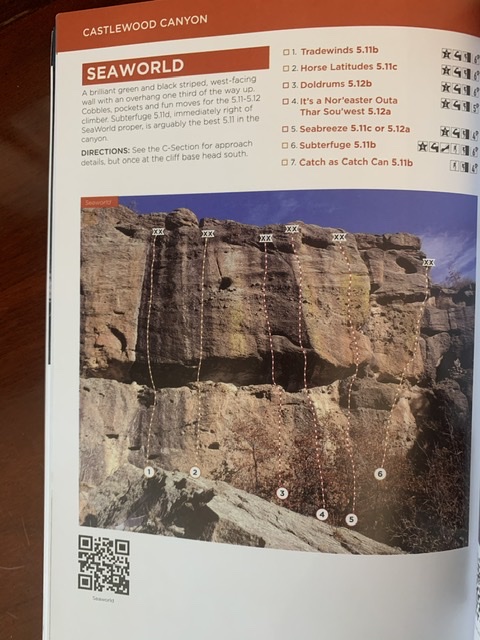
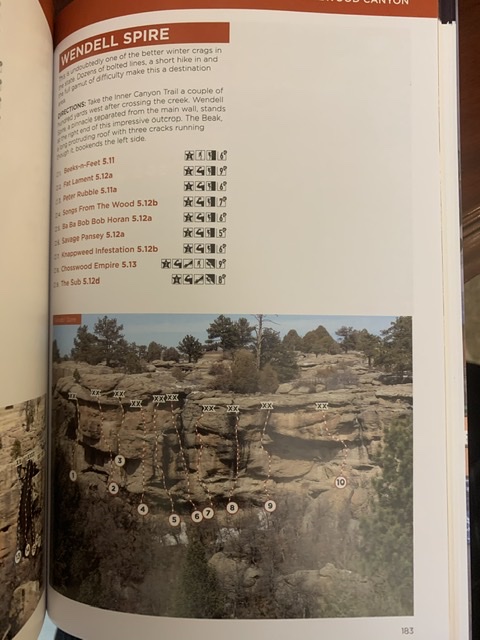
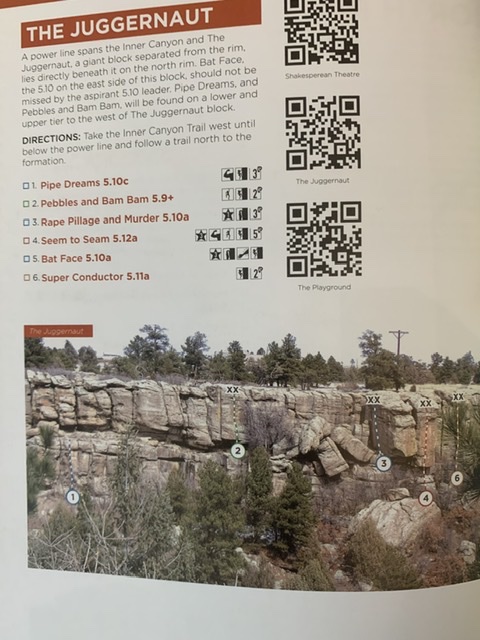
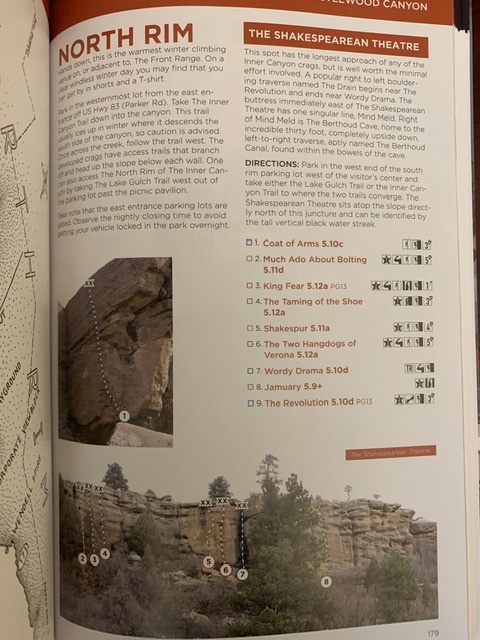
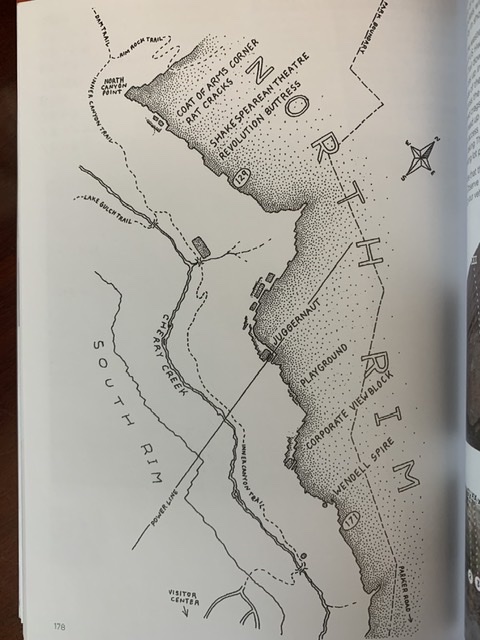
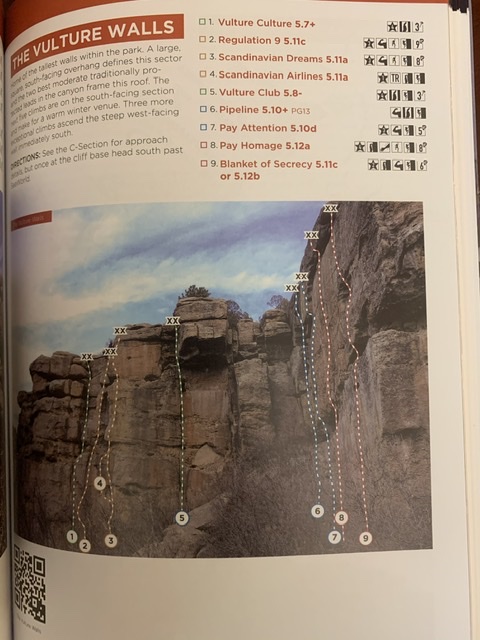
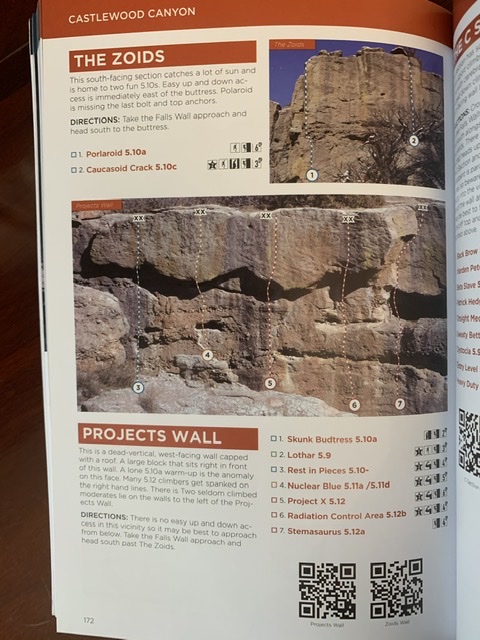
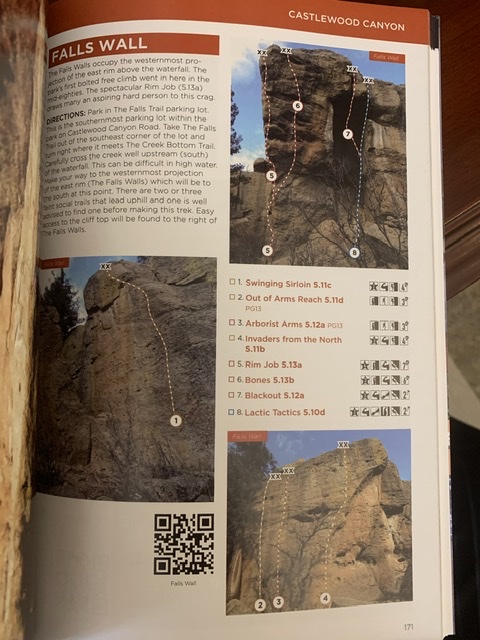
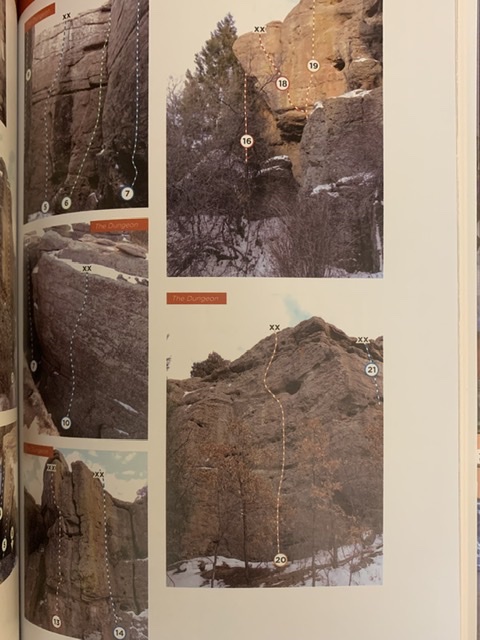
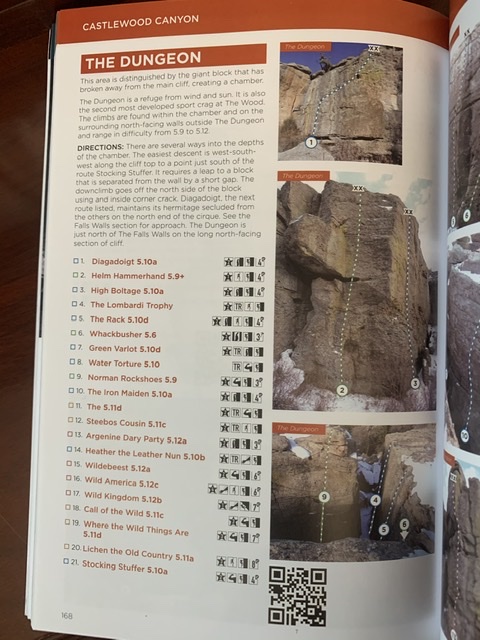
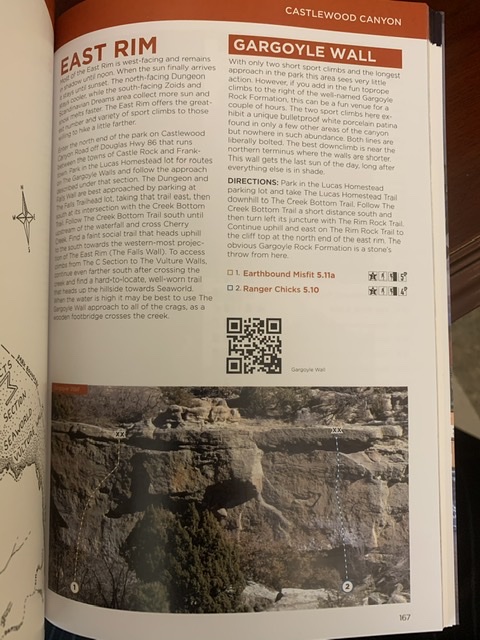
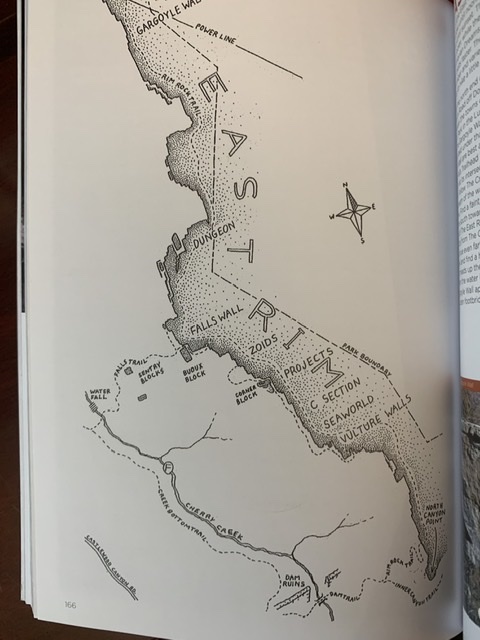
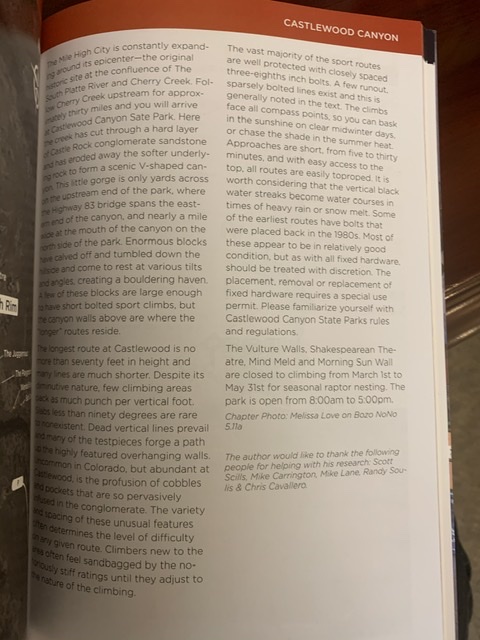
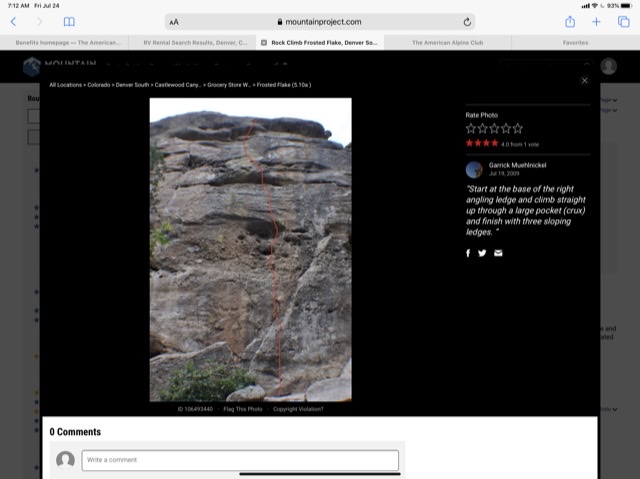
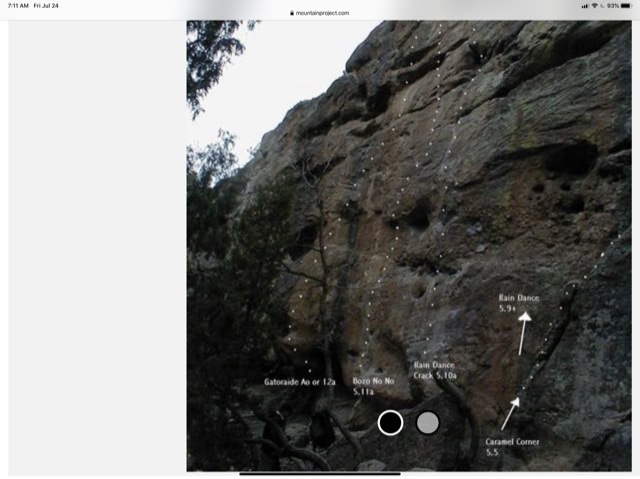
Our Favorite Pages from the Castlewood Canyon and Colorado Springs Guides for our daughter to remember our routes:


Why We Climb


While all of the Arc’teryx line is super, the Sigma FL Pant – Men’s in particular is fabulous for climbing, matched with the the La Sportiva TX2 superlight weight approach shoe.
Ice Climbing
Learning to Live with Fear
The journey isn’t so much about becoming someone, it’s about getting rid of everything that isn’t you. The Big Ideas: What Do We Fear? Nothing in life can create stress for you. Instead stress is a product of how we perceive the situation.
From the NY Times
If you defy death — and gravity — enough, everyday life stops being so scary.
By Alex Honnold
Alex Honnold is a professional climber who has completed dozens of solo ascents.
This essay is part of a series called The Big Ideas, in which writers respond to a single question: What do we fear? You can read more by visiting The Big Ideas series page.
I free soloed Half Dome, in Yosemite National Park, for the first and only time in 2008. I climbed alone, without a rope or protection, and reached the route’s first major difficulty, or crux, about 300 feet up the wall. It was a shallow corner feature that required absolute commitment and execution to manage without falling. I had climbed the wall with a rope before and knew that I was physically capable of doing it, but now, with my life on the line, it suddenly felt much harder. The footholds seemed more slippery, the body positions more tenuous. I was scared, and overgripped with my hands as a result, which only made me tire more quickly. My vision narrowed and my movements got jerkier.
Despite all that, I made it through the crux. I still had 1,700 feet to go.
Fear is an interesting counselor. There are times when it’s incredibly helpful, warning me that I’m not quite ready for a particular challenge. Climbing is inherently scary — even when I’m using a rope there’s some risk of injury, however small, and my body will often set off alarm bells when I’m high above the ground. This reaction comes despite having climbed intensively since childhood. Although my rational mind knows I’m quite safe, my body still reacts to the central fears of pain and death. Sometimes, though, my fear takes on a life of its own, trying to warn me about dangers that are only in my mind.
The key to managing fear is to remember that it’s always driven by a kernel of truth. The problem is that all fear feels the same.
I experience the same sensations in my body whether I’m facing down certain death or about to speak in public. In fact, one of the scariest experiences of my life was giving a TED Talk on the conference’s main stage in 2018. I spent some of my time talking about my experience free soloing Half Dome, yet, ironically, I was probably more afraid during the talk than I was hanging on a rock face hundreds of feet in the air. I’ve always been shy and introverted by nature, but the TED Talk required me to speak in front of an incredibly esteemed audience and, more frighteningly, to memorize my whole presentation. It was basically my worst nightmare, and it felt much scarier than free soloing a big wall.
Thankfully, my rational mind knew that I would still be objectively safe, no matter how scary being onstage felt. And in this case, my fears proved both justified and overblown: I was underprepared, and felt so nervous that I wound up forgetting an entire paragraph of my conclusion. But the audience was none the wiser for my slight fumble, and the talk seemed to be well received.
On my free solo of Half Dome, I got more uneasy as I climbed. By the middle of the wall, at the true crux of the route 1,000 feet up, I was so scared that I impulsively decided to change my path to try to bypass the difficulties. That decision led to a whole host of new doubts and fears stemming from having to adapt to a change I hadn’t planned for. Even though the new route worked, my mind continued to fray. By the top of the wall, I felt hollowed out. I’d been suppressing, managing and generally wallowing in my fear for far too long — much longer than the three hours it took to complete the climb. I succeeded, but it felt like a failure because I’d been afraid the whole time.
People sometimes assume that because I free solo I must not feel fear, or that I’m simply wired differently. But the truth is probably the opposite: I’ve just gotten scared so much that I’ve learned how to better understand my fears. I’ve done dozens of serious solos, like Half Dome, and countless easier ones. I’ve even lived through giving a TED Talk. Each one has been scary in its own way. But I know when to listen to those warnings from my body, and I’ve learned to differentiate between real, physical danger and general anxiety.
That, I believe, is the true gift of my experience as a climber. As long as I know I’m not in real danger, I have nothing to fear.
Alex Honnold is a professional climber and the subject of the recent Disney series “Arctic Ascent with Alex Honnold.”